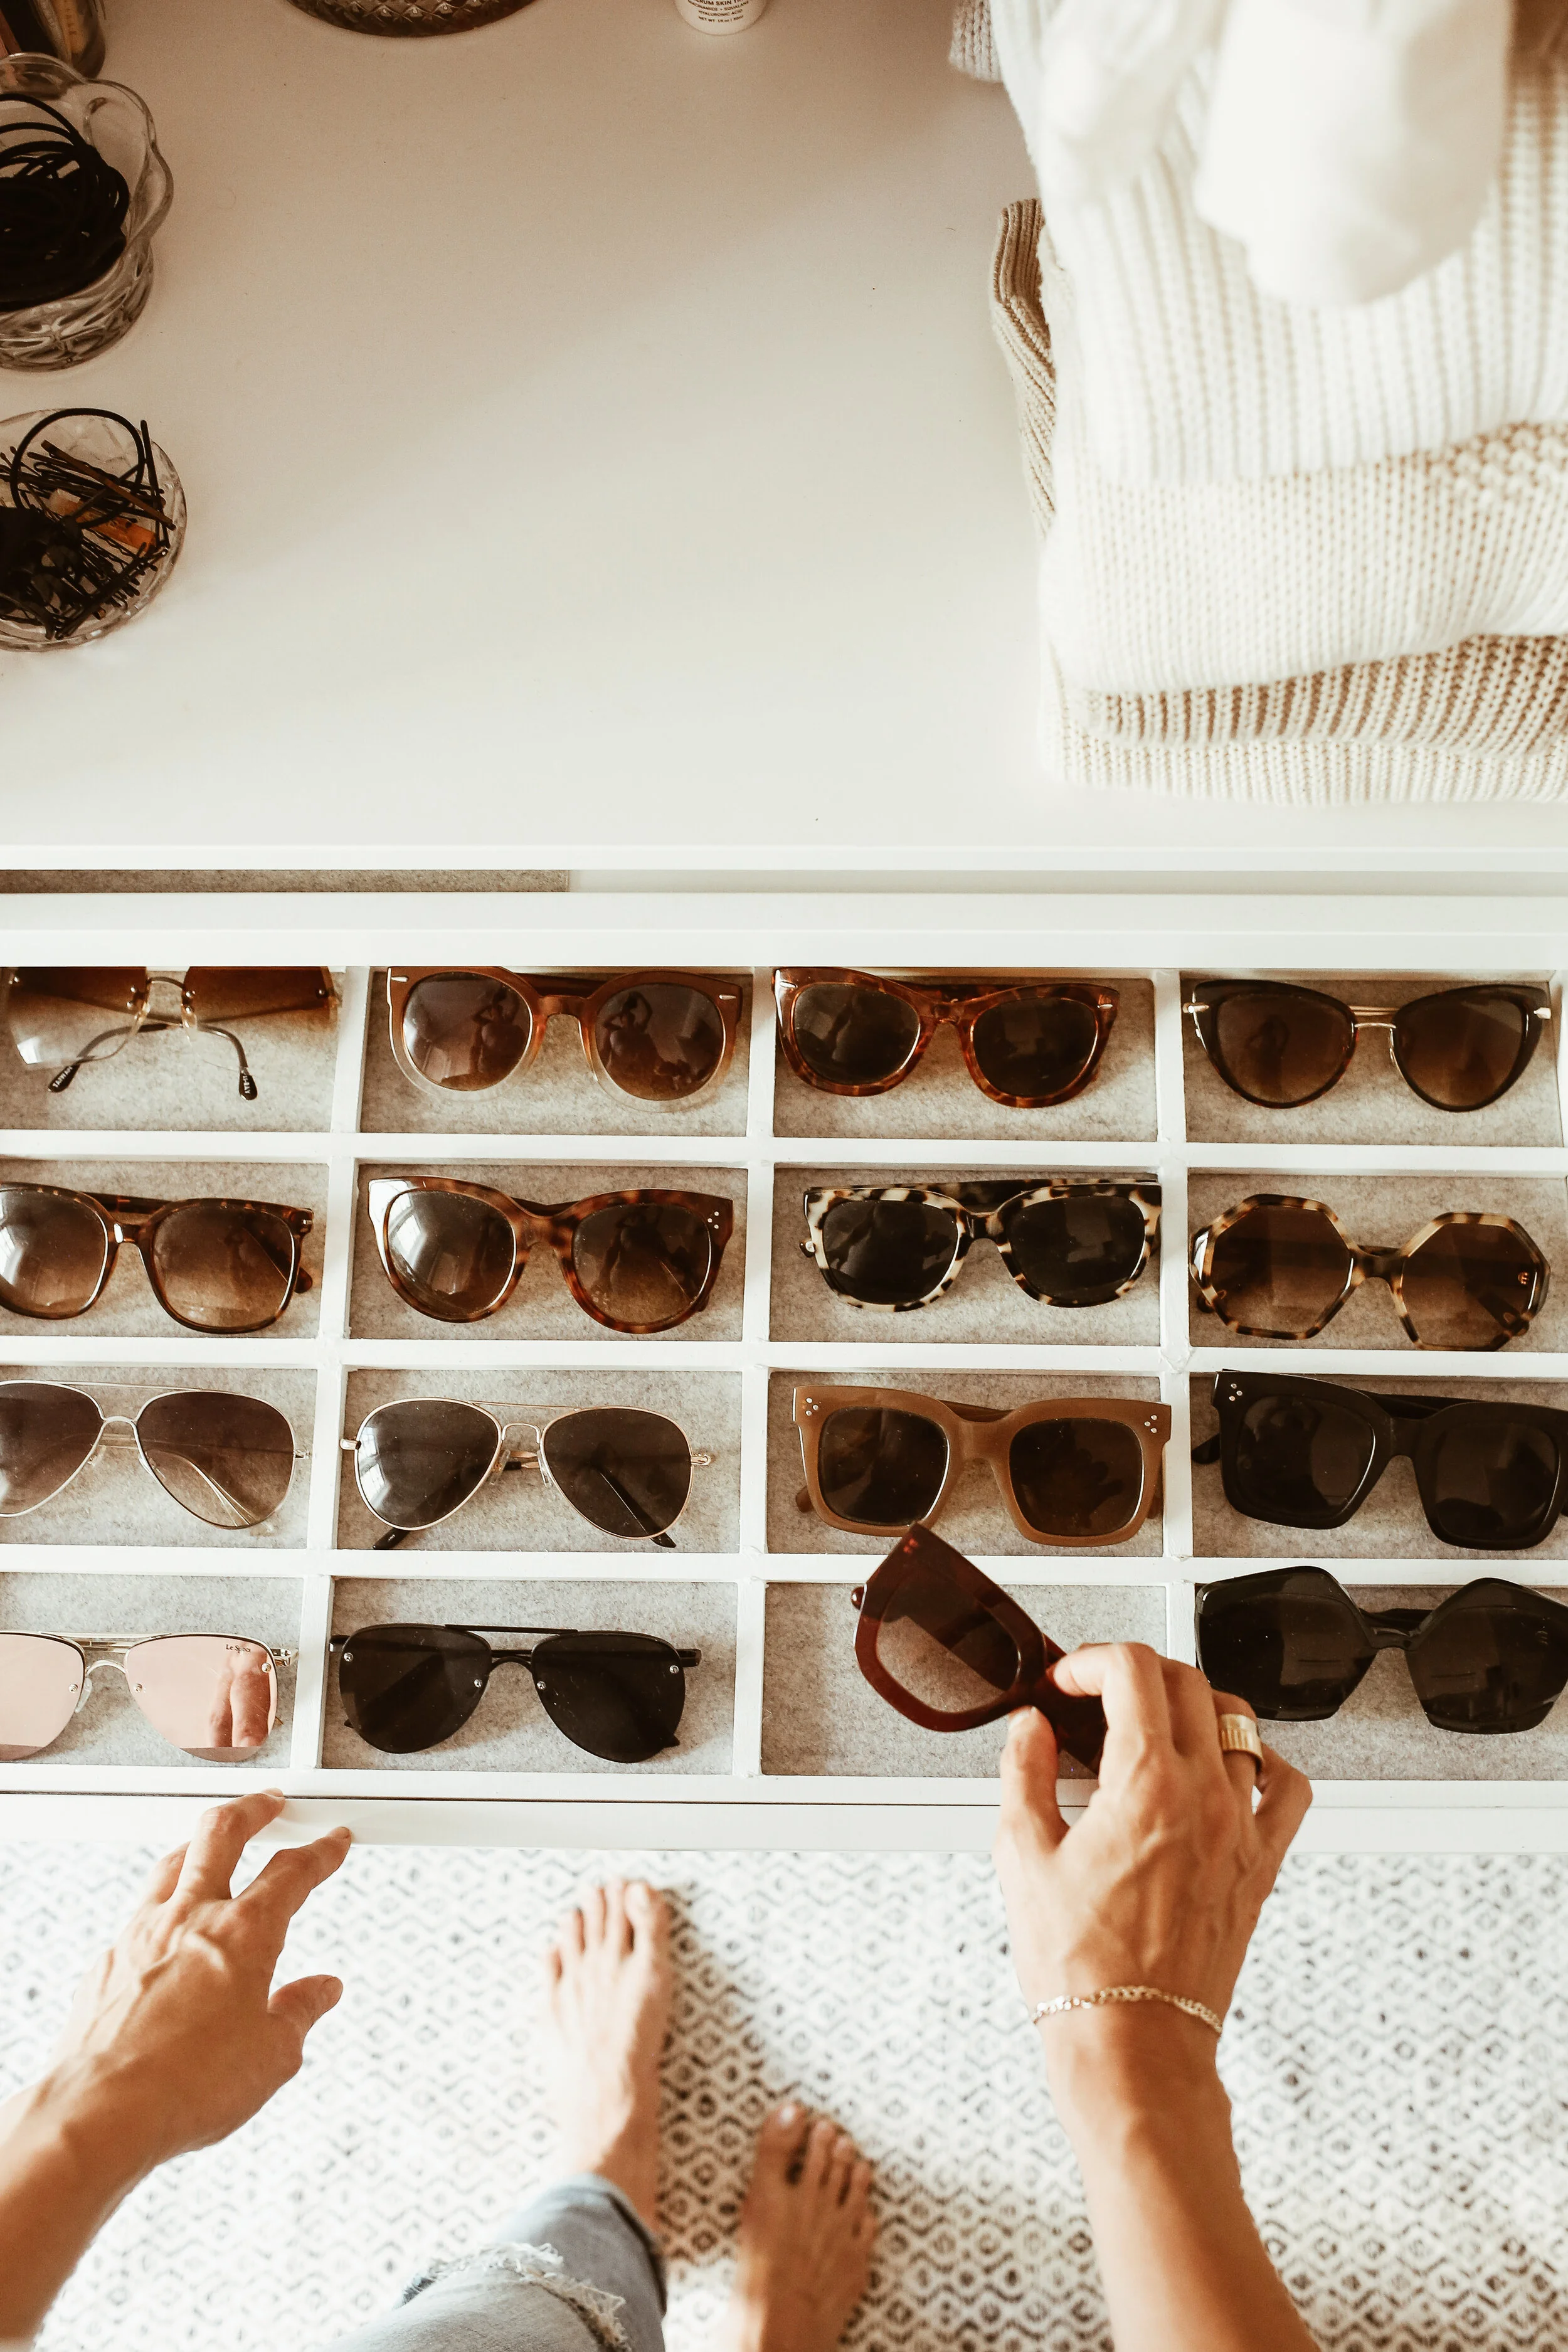
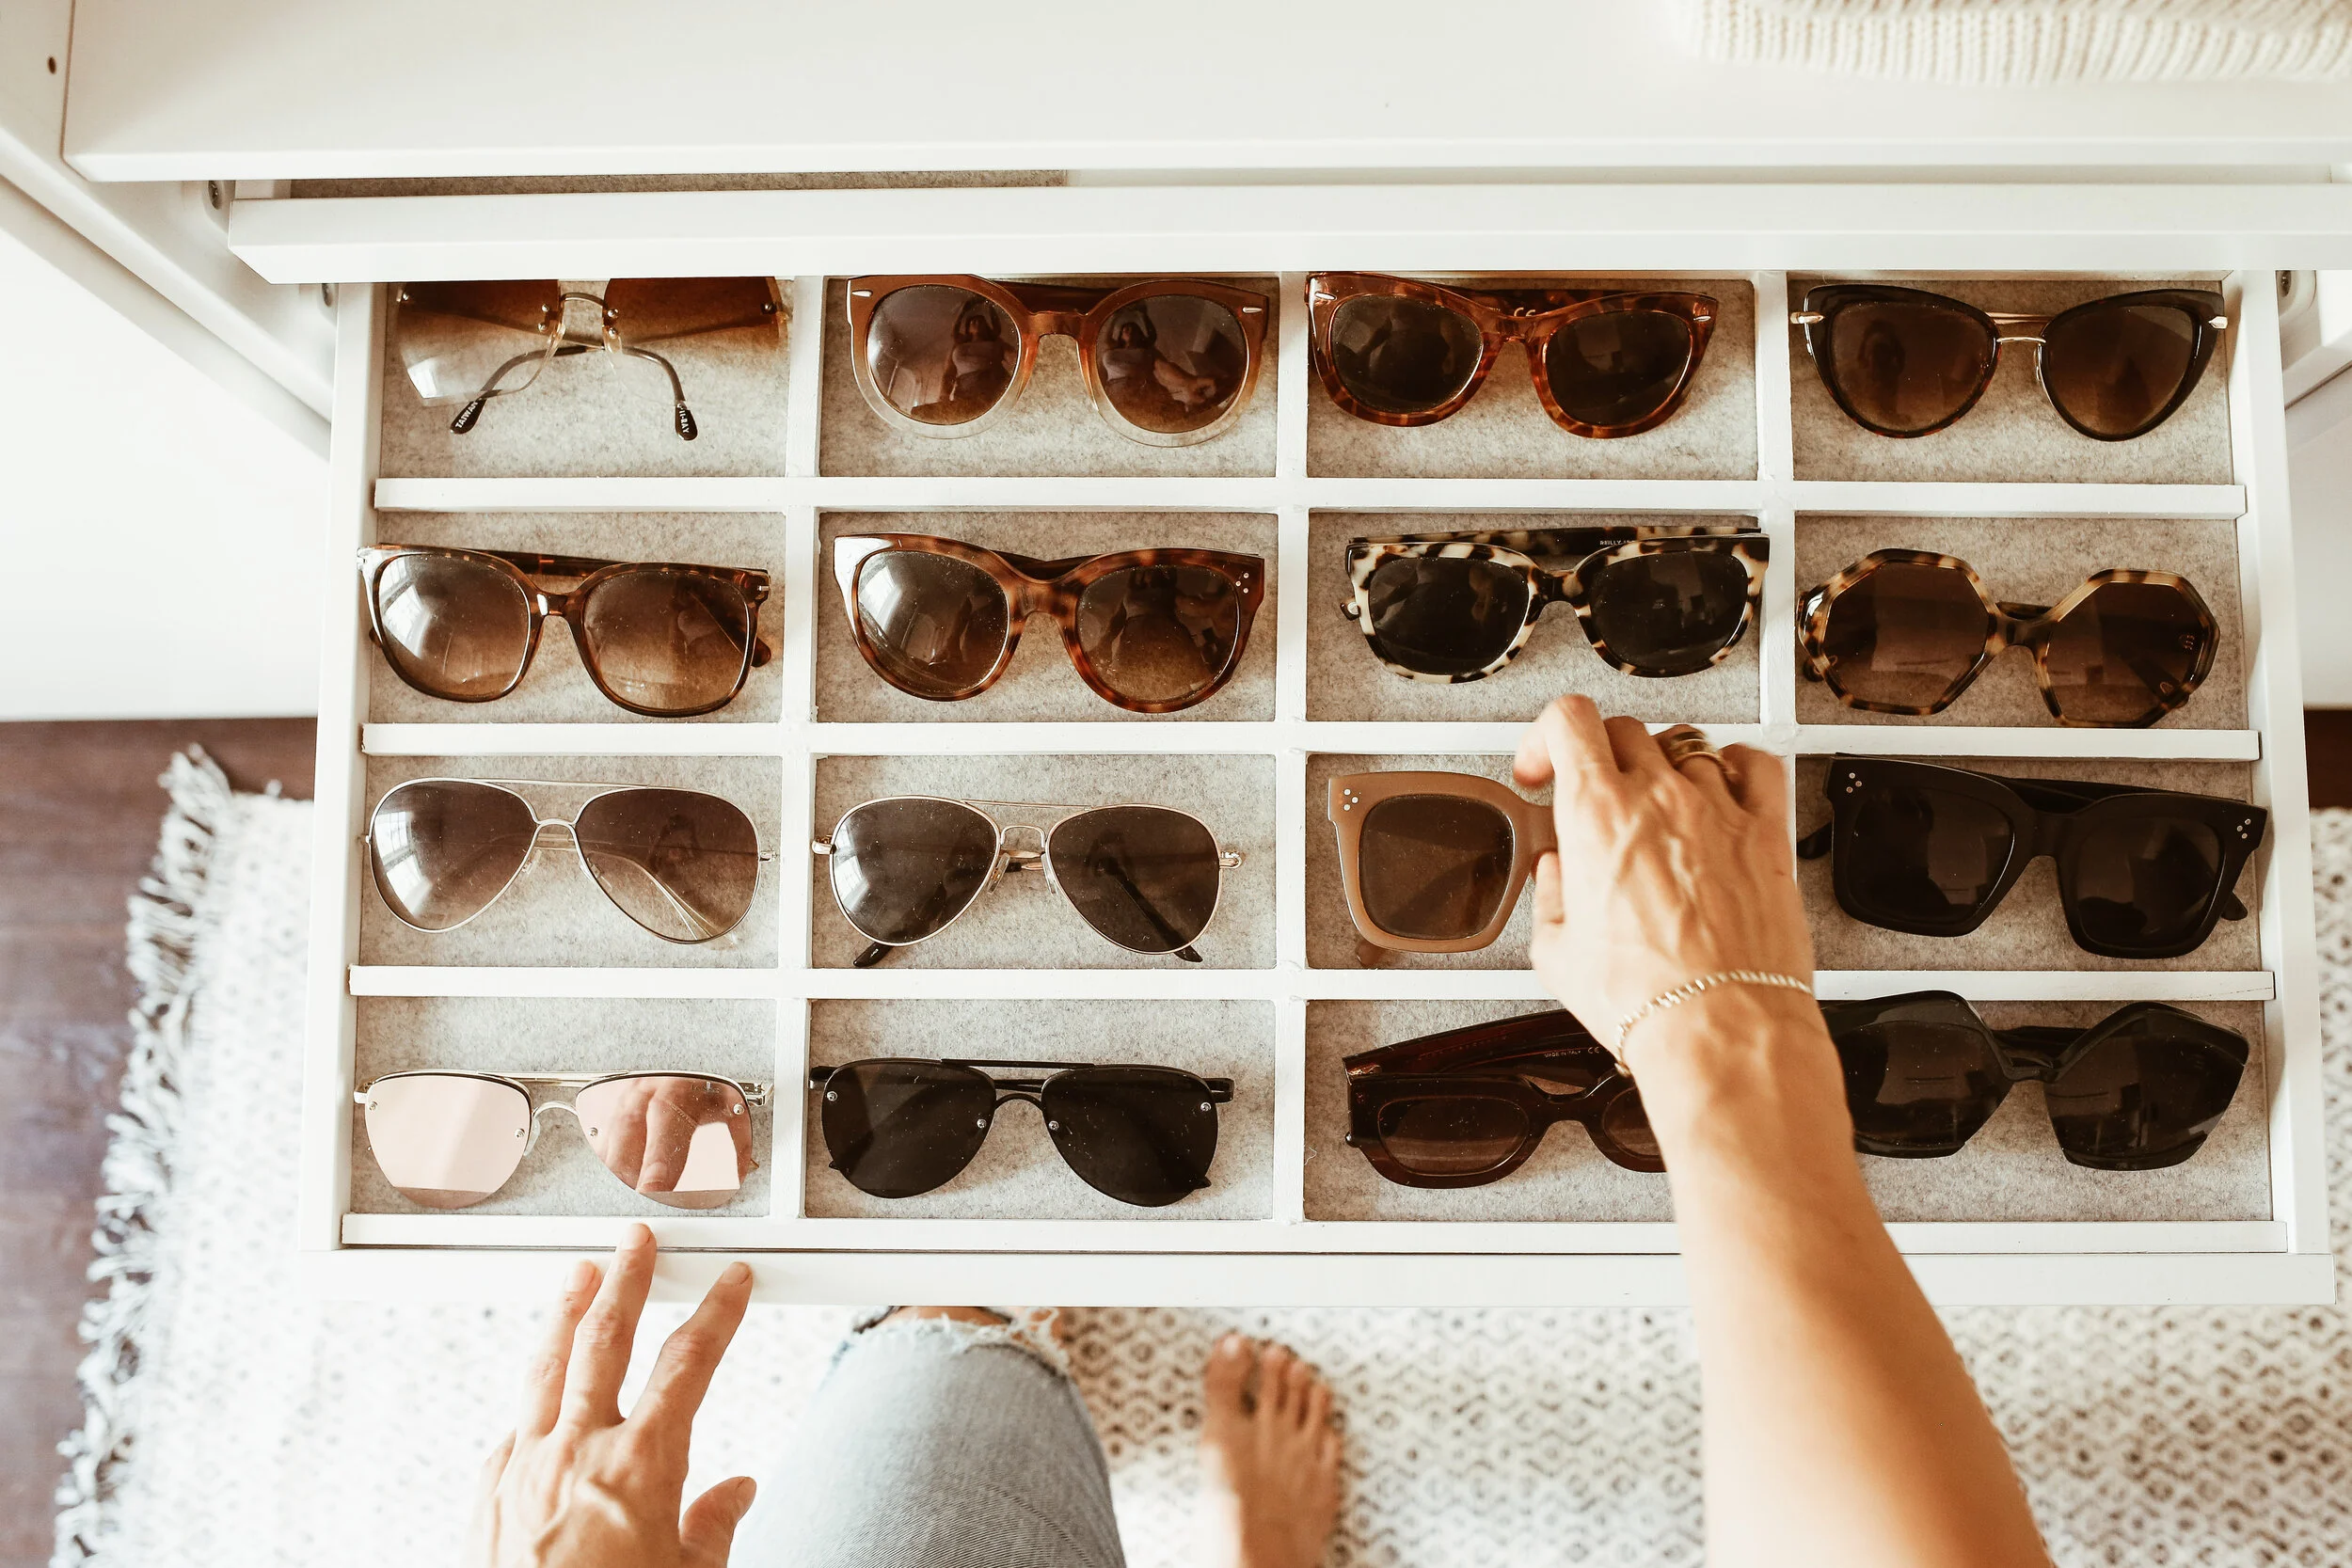
DIY Sunglass Organizer Tray
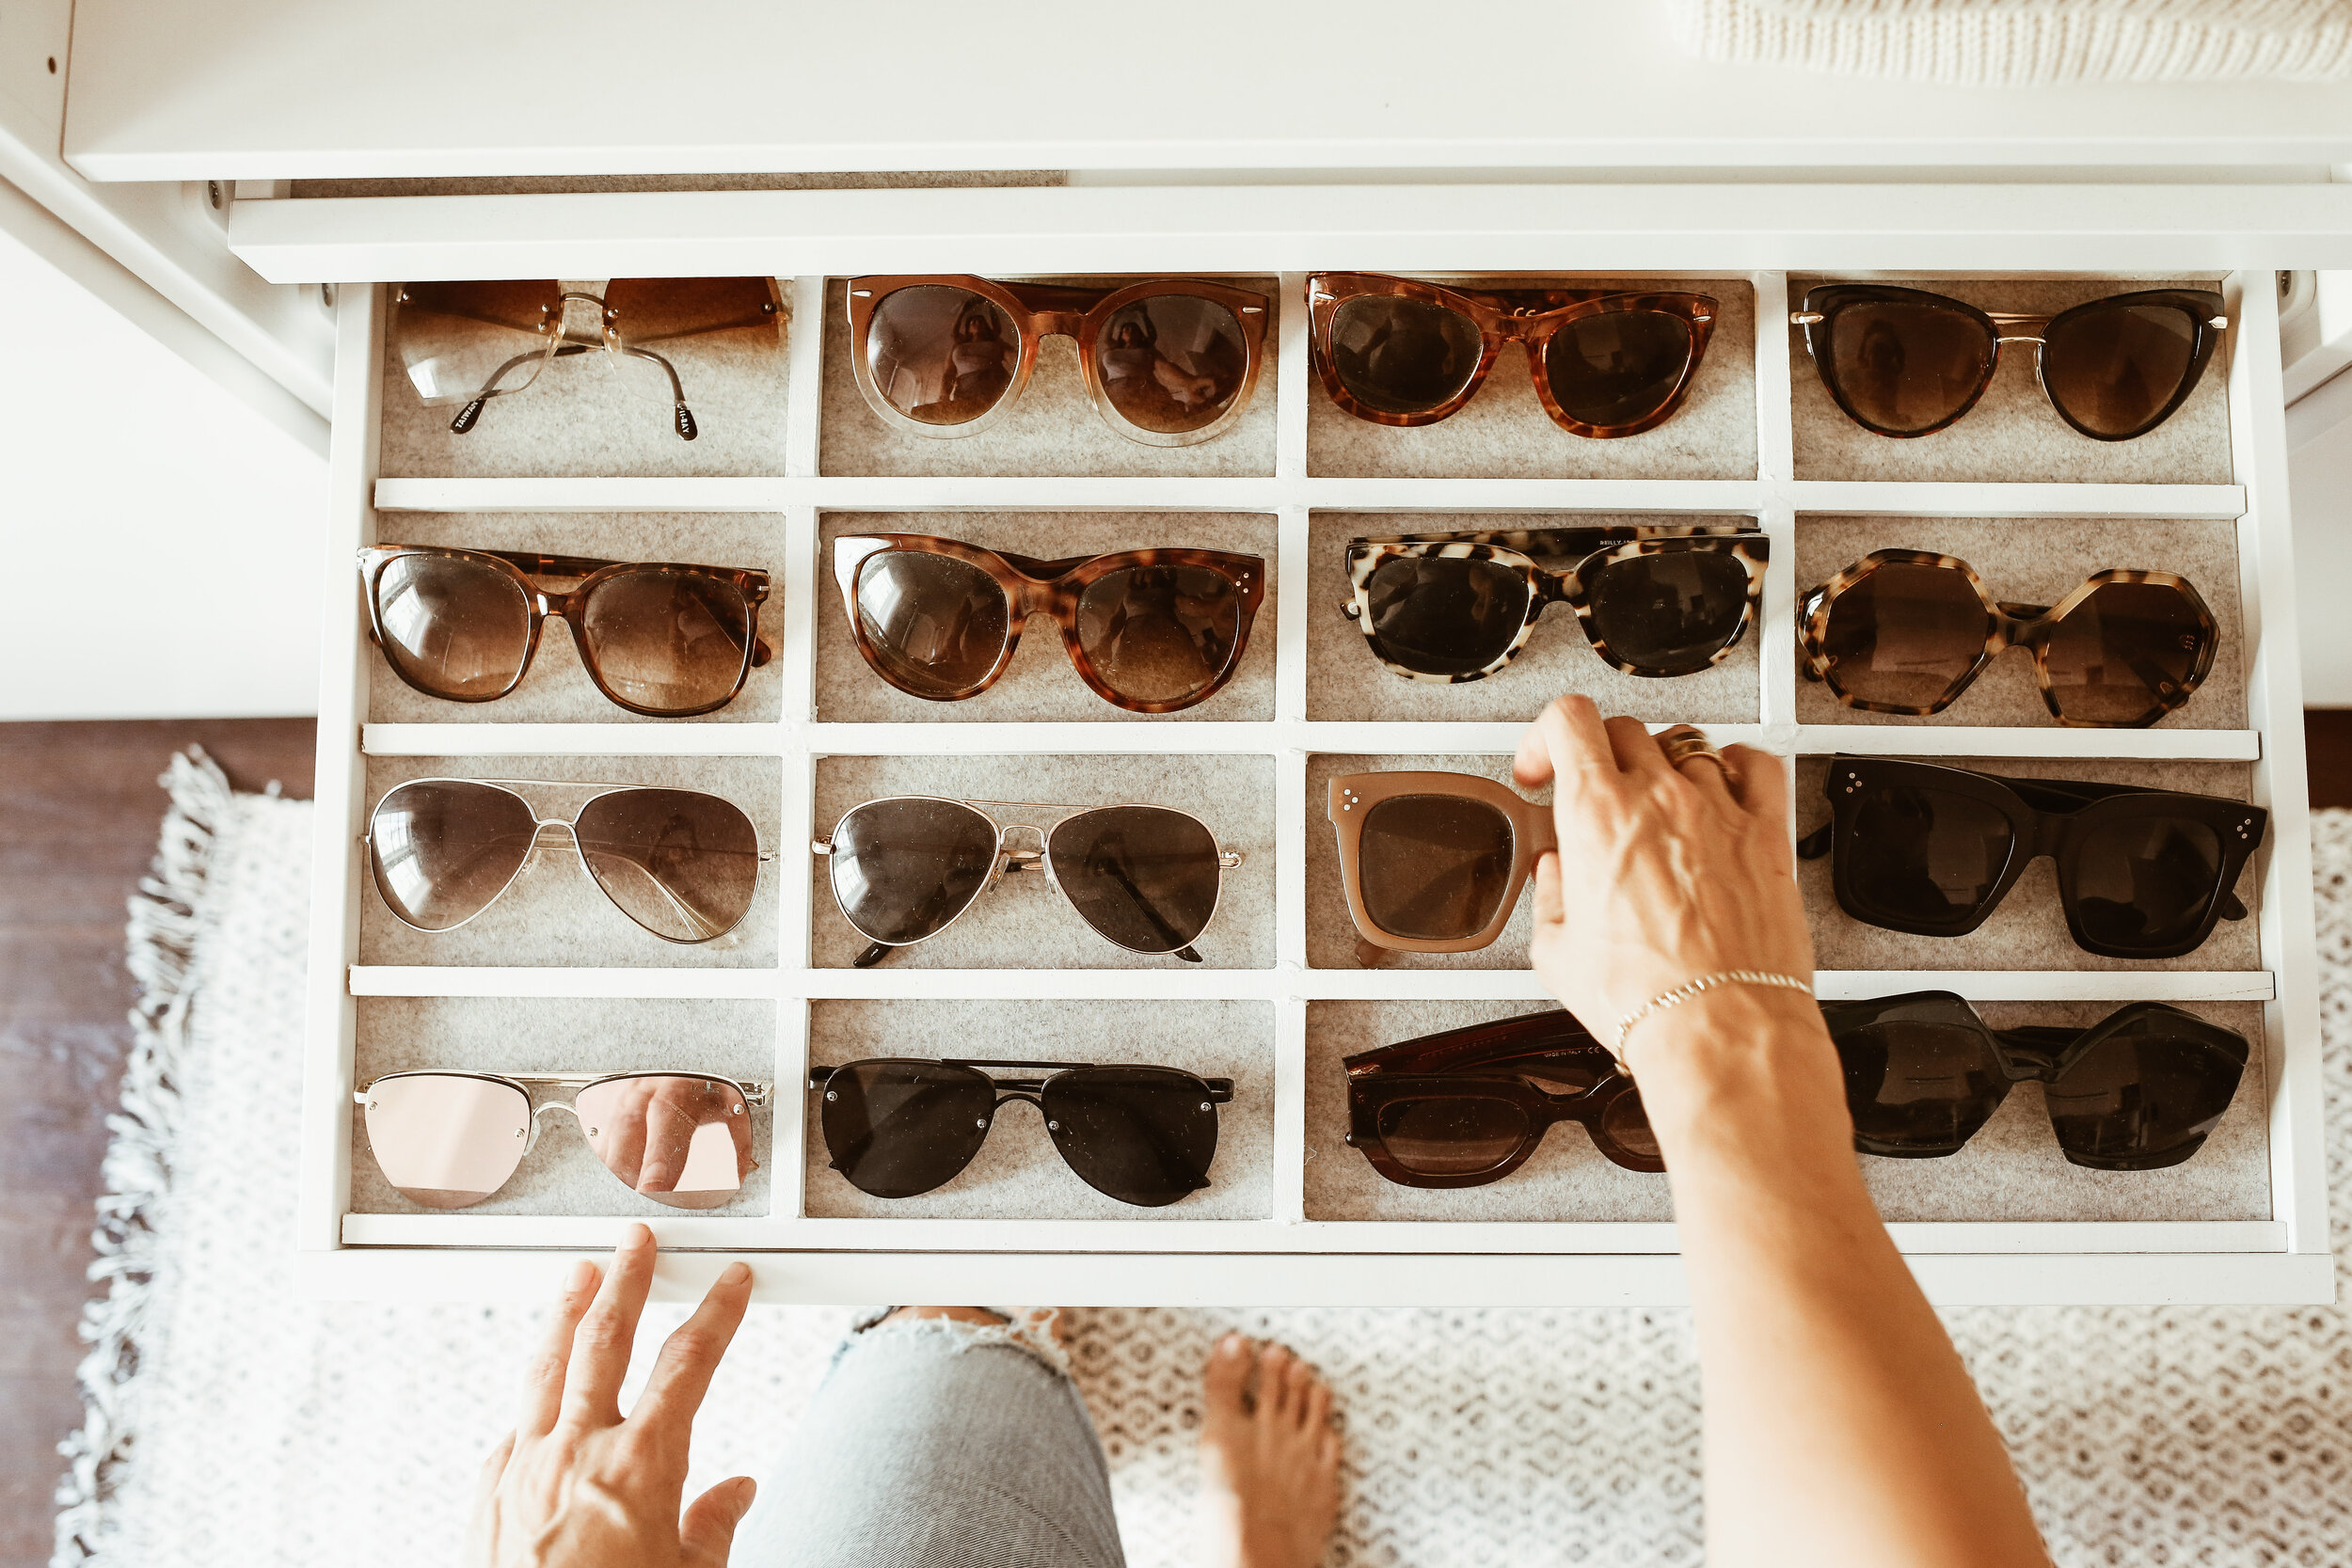
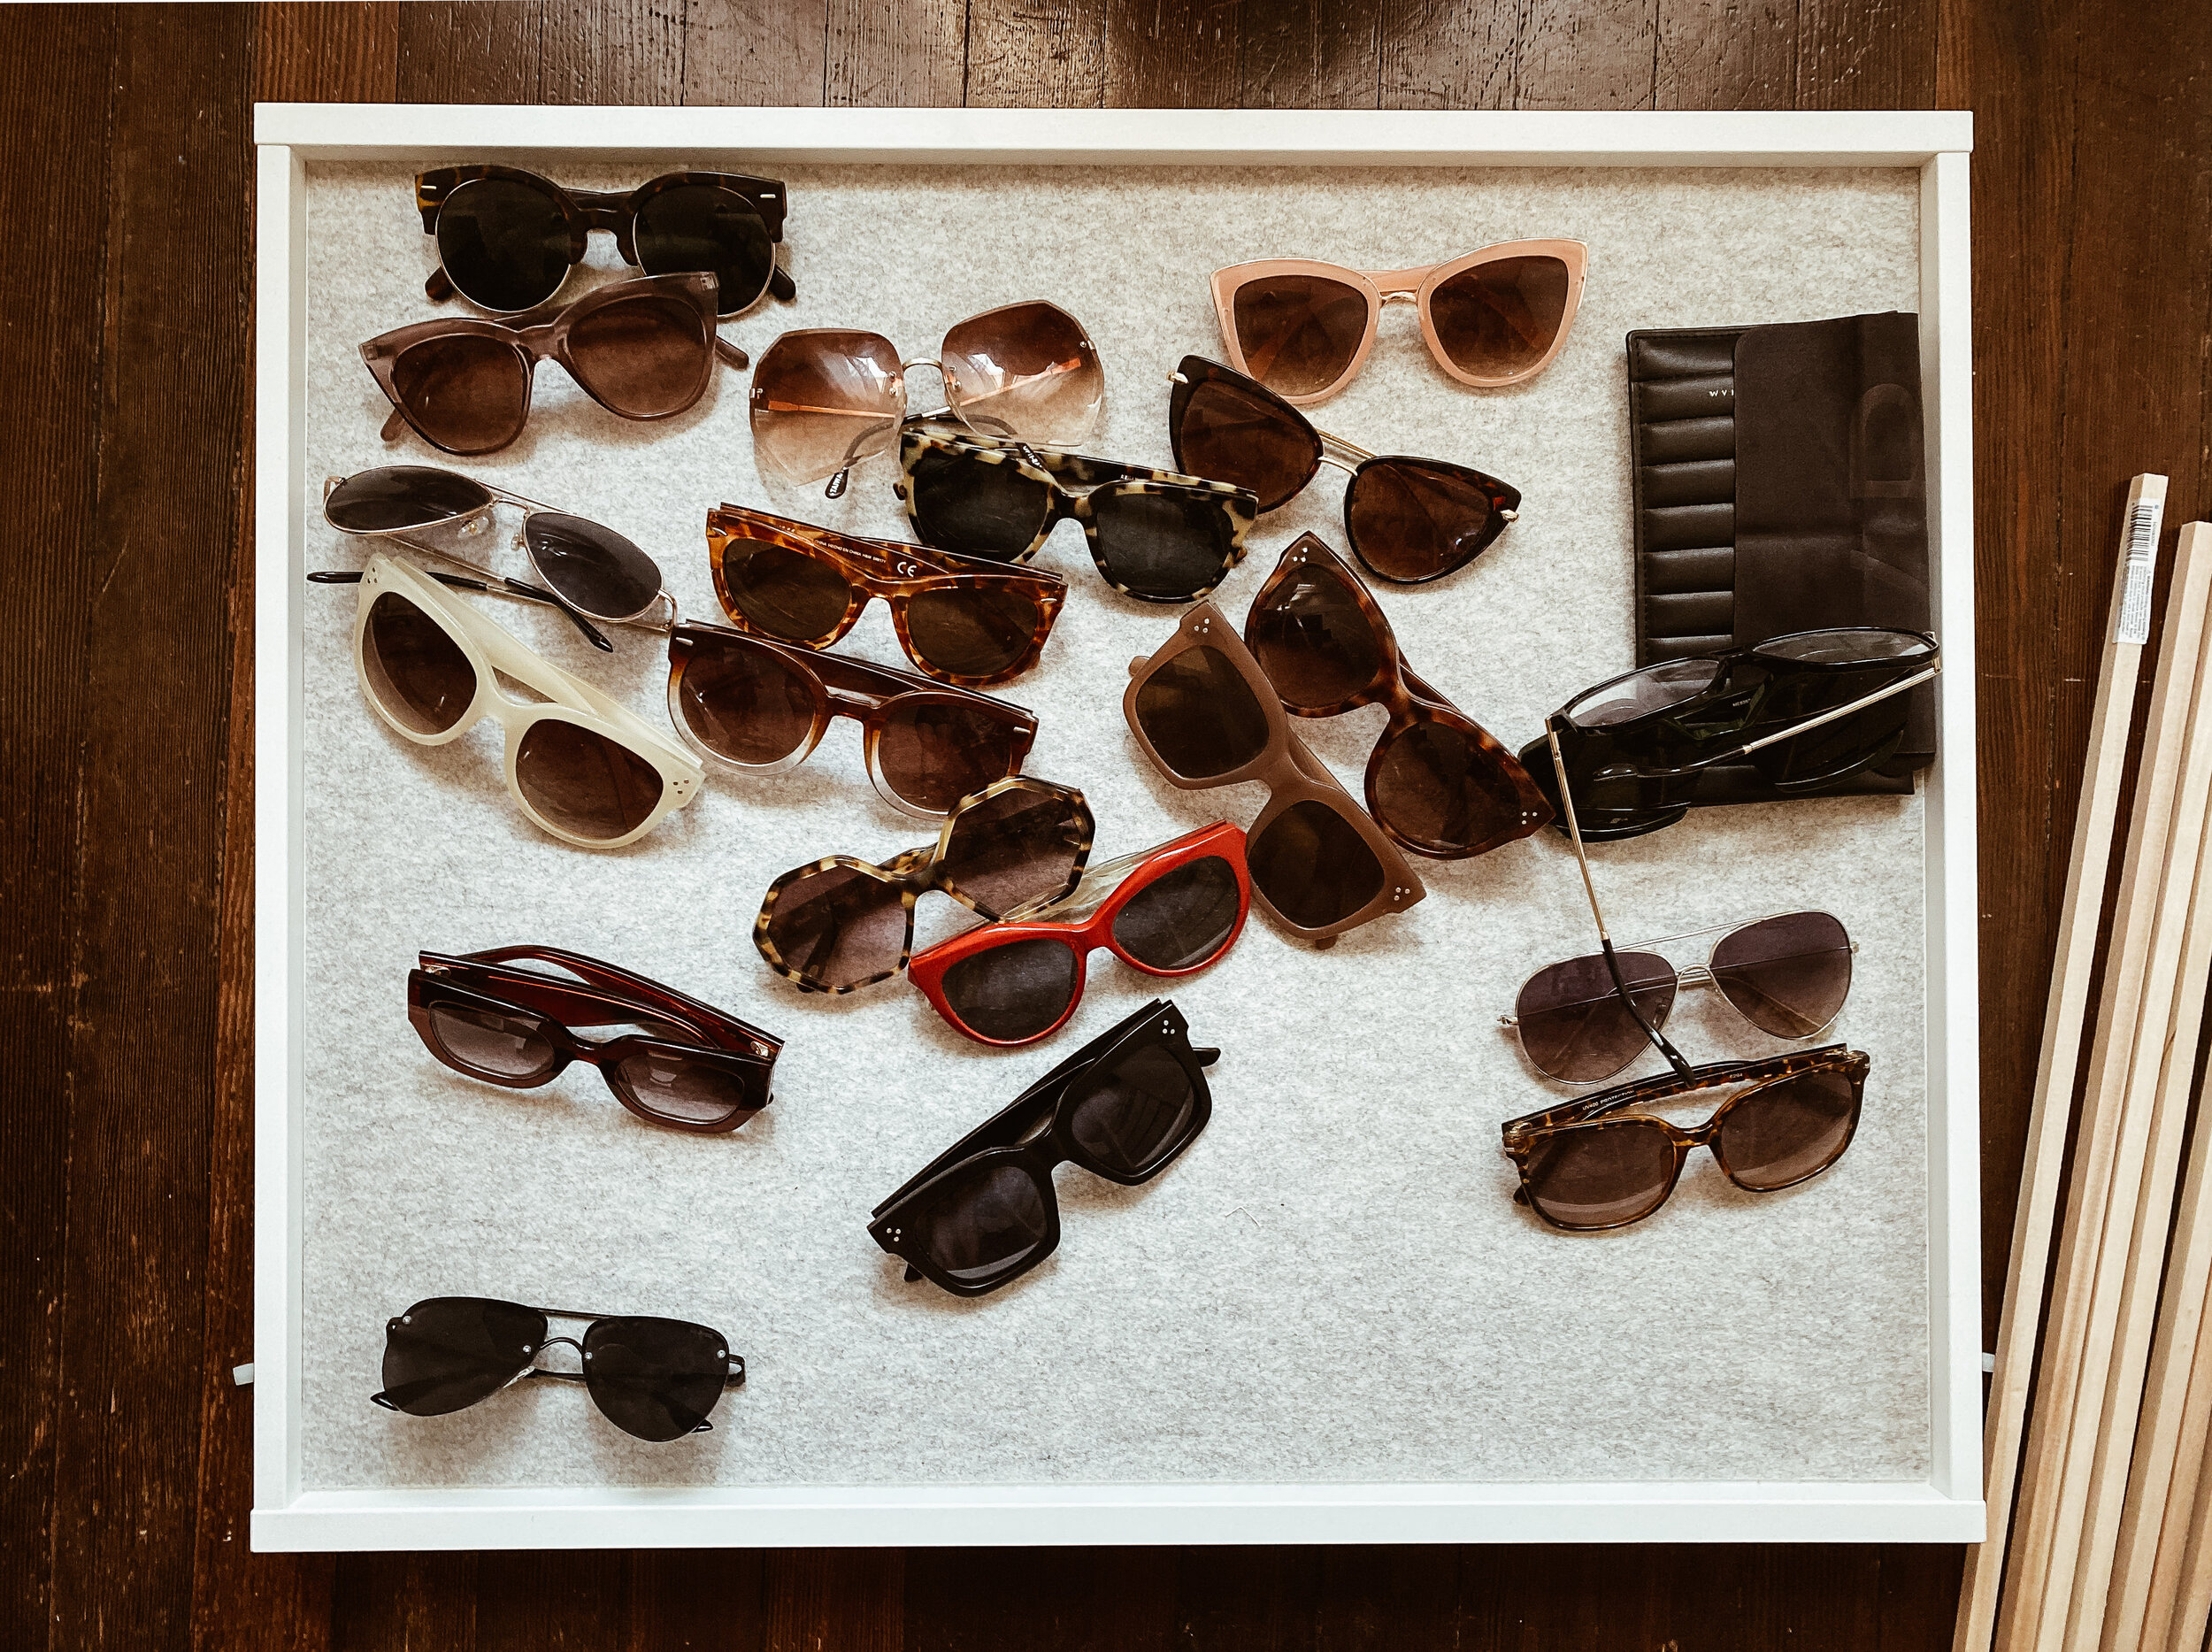
When I was designing my closet, I knew I needed a drawer for my sunglasses. What I didn’t know I’d need for said drawer is an organizer. I somehow foolishly thought that my sunglasses wouldn’t slide around so long as I had the drawer lined. But, as I’m sure you’ve gathered from the title of this post, I was sorely mistaken.
I set out on a search for sunglass organizers that weren’t plastic and that weren’t a million dollars. Turns out, that combo doesn't mix. And, as I always say, if you can’t find what you want, make what you want. So here we are.
This DIY sunglass organizer costs about $20 give or take (depending on what supplies you might already have on hand) and everything can easily be found at your local hardware store, or even a craft store. It was created to fit a Komplement pull-out tray for the Ikea Pax Wardrobe system, but the same instructions can be adapted to work for any sunglass tray or drawer.

DIY Sunglass Organizer


8 - ½” x ½” x 36” hardwood square dowel (6 pieces for the rows and 2 for the columns)
Wood Glue
Toothpicks
White Paint (or other color of your choice), flat or glossy
Foam paint brush
Pencil
Tape Measure
Wax Paper
Exacto knife
Felt drawer liner (we used this one, but you could also sue something like this)
Step 1 //
Measure your tray/drawer space. The space measured for this DIY tutorial was 21.5” x 25”. Odds are the material you buy from the hardware store won’t be a plug and play situation, so measuring the space that you intend to build the display rack in is key. Once you have the dimensions of your measured space for your materials, the next step is to determine how much space you want for each pair of sunglasses. To determine the space you will need for each pair of sunglasses, measure a pair of sunglasses. Once you have those measurements, I recommend to add an inch to those measurements on each side of the sunglasses. Next, that that measurement and divide amongst the length of one of the dowels to understand how many pairs of sunglasses will fit in each row. Use the same to determine how many columns you will need and how many sunglasses will be able to fit. An important tip, be sure to factor in the size of the dowel itself when calculating the space needed for each row. Based on the measurements of the space I used, there was enough for 6 rows and 4 columns, for a total storage of 24 pairs of sunglasses.
Step 2 //
Take a pencil and mark on your tray/drawer where each dowel will be placed for each row. This will provide a guideline for measurements for cuts and then placement of the insert once it is complete. After you have made the marks on your space, mark the edge on each dowel where you will make your cuts.
Step 3 //
Make your cuts. Once you have cut the dowels to make the rows of the insert, place them in your measured space. As a best practice, with your pencil, number each dowel on one side as this will avoid any confusion when assembling the insert. Additionally mark off each dowel you will use for each row for the spacing of each pair of sunglasses. For the space I used, 6.25 inches was the correct spacing needed.
For the pieces to build the columns, mock up a row by placing pairs of sunglasses with a dowel above and below on the measured space. This will allow you to see the space you will want. For the space I used, 3 inches was the correct spacing needed in between each row. Next, with your pencil, mark off 3 inches along the length of one of the square dowels you had set aside for the columns of the insert. You can also use any excess cut off of the dowels used for the rows of the insert. Again as a best practice, with your pencil, number each 3-inch cut piece of dowel on one side.
Step 4 //
Give the dowels meant for the rows a quick coat of paint on the side opposite of the side you marked with a number. This will be the top or the side of the insert that will face up in your tray or drawer.
Step 5 //
Cover your tray/drawer with wax paper. This will help when assembling to protect the tray from the wood glue. Going back to the tip of numbering each piece of wood, assemble the insert in the number order of the wood for the rows and columns.
To assemble, use a toothpick to dab a drop of wood glue on the end of each 3-inch dowel piece and place along the marked areas on the dowel used for each row, using a toothpick to clean away any excess glue. Apply pressure to ensure the wood adheres to each other. Repeat until all of your rows and columns are secured together. Let it dry overnight to ensure that the glue and wood have fully bonded.
Step 6 //
Once the insert is fully dry, gently peel it off the wax paper. If any wax paper or excess residue from the glue remains, use an exacto knife to cut it away and remove it.
STEP 7 //
The last step is to complete painting the insert. Since my closet and the space I designed this for is white, I chose a flat white paint to finish it off, but you can choose whatever color paint works for you and your space. I gave my insert a total of three coats of paint, allowing each to coat to fully dry in between, before giving it the next coat. Again, depending on the paint/color you choose to use, you may need to give the insert more or less coats of paint.
STEP 8 //
Line your drawer with felt liner (or another soft drawer liner of your choice…just be sure to use something soft as you want to ensure that your sunglasses don’t get scratched up). Then place the insert on top, gently pressing it into place.
STEP 9 //
Organize your sunglasses and enjoy!
Hover over any of the below photos to see captions that explain each image and the steps being demonstrated
The drawer, pre-organizer, and some of the supplies

Figuring out the placement for the rows

Using sunglasses as a guide to help set up the correct spacing

A rough estimate of what the finished insert will look like

Insert pieces numbered to help with placement guidance when assembling the insert

Painting the dowels

Assembling the insert

Using a toothpick to clean up any excess glue

The fully assembled insert, drying overnight

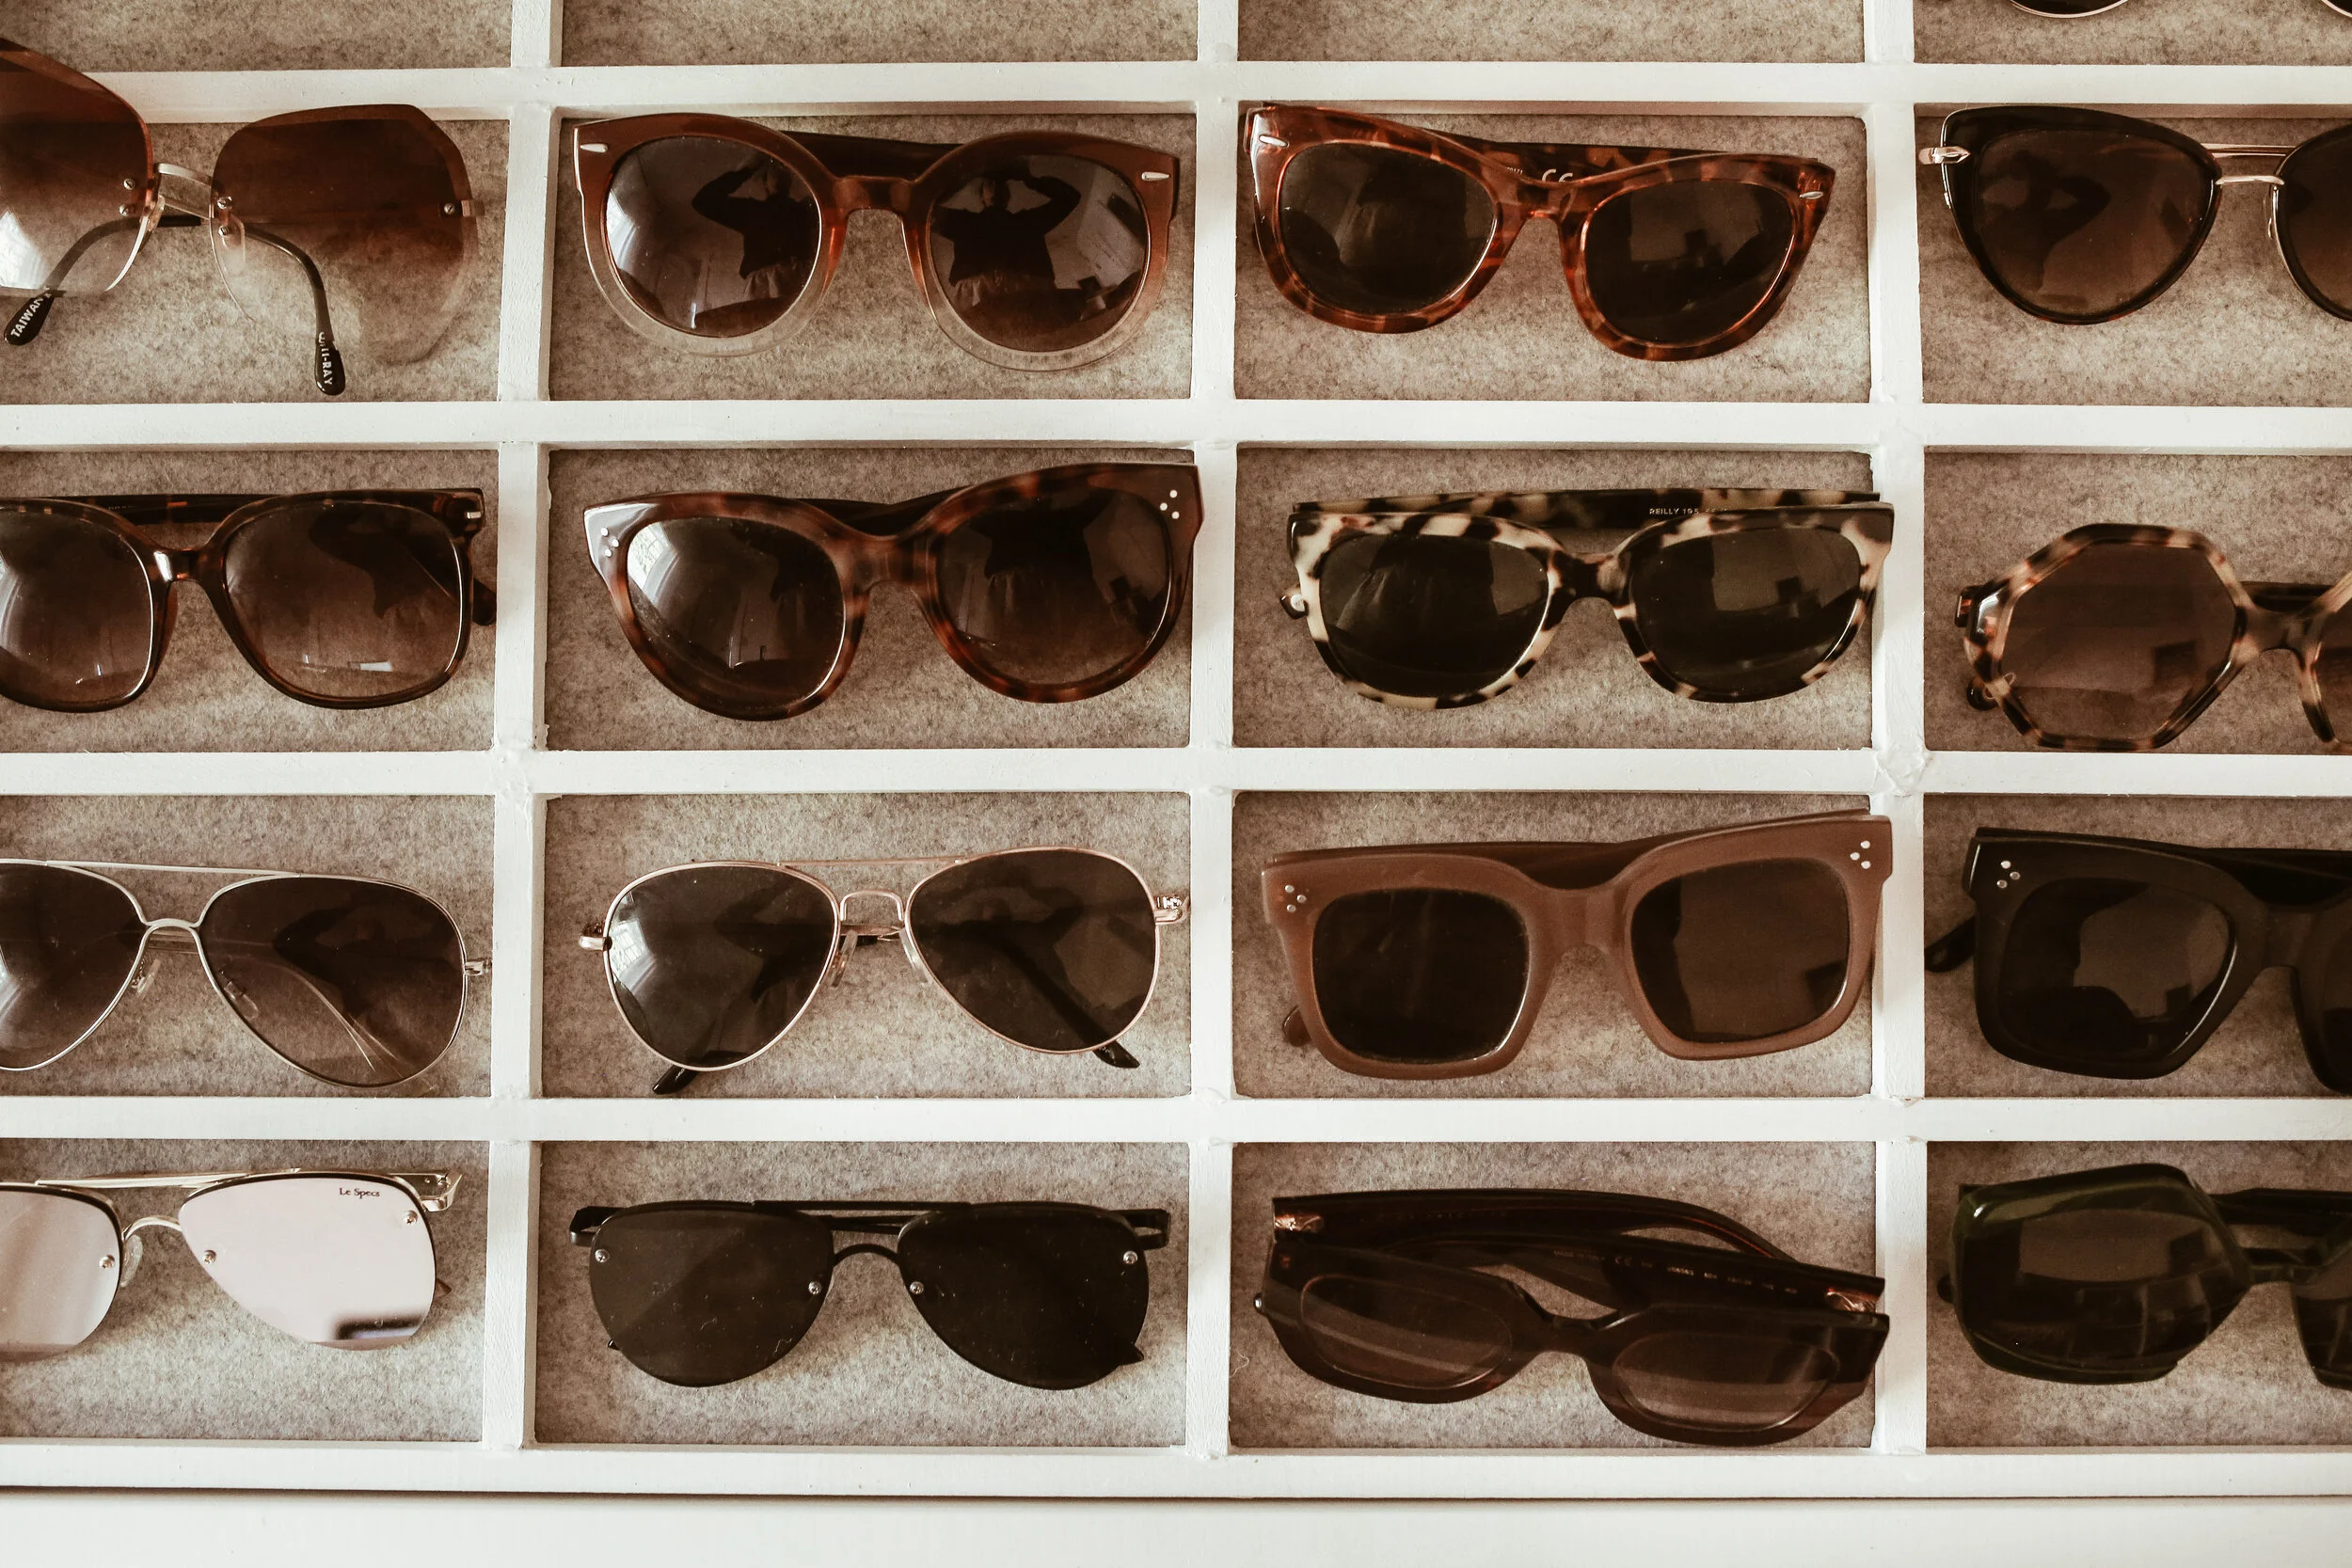

Add the insert to the lined tray