Photo School // CLASS 007 - How To Take Better Food Photos
And just like that, it’s the last lesson of our mini photo school.
(Or at least for now, anyways.). I saved my particular favorite for last, how to take better food photos. As with all things photography, I’m no professionally trained expert. Everything I (and Dave) know has been self-taught through years of practice (and good ol’ Google), but I adore food photography so much. It’s not always easy (dips, soups, anything brown can be a truly terrifying nightmare to capture), but I think it’s those added challenges that come with the territory that I find so fascinating. I also think of taking food photos much the same way I do as painting a photo, with different lighting and props setting different tones and moods, adding more of one color and painting over another for varying effects. It’s really quite fun and artistic and I often feel like I’m a kid again, playing with my food, just in a bit more organized and calculated manner (and with the often added bonus that I’m getting paid to do it #childhooddreamsdocometrue). While there are certainly things you can do to take better food photos, tricks of the trade, etc., etc., I also think that there is a lot of room for self-exploration, finding what works for you and developing your own distinct style. In other words, don’t rush the process and definitely don’t beat yourself up if you don’t get the hang of it right away.
CLASS 007 // HOW TO TAKE BETTER PHOTOS OF FOOD

Preferred Lens // As with everything, I used a variety of lenses, but when it comes to food my favorite is a 50mm. It’s perfect for getting those close-up detailed shots with blurred out backgrounds. If you’re shooting on your phone, use portrait mode for a similar effect.
Tethering // Use a cable (or remote tether) so you can instantly see your shots and make adjustments as necessary, as well as apply edits immediately. This has been a total game changer for me, not only for shooting better photos from the get-go, but also in taking less photos (which means less time sorting through photos in post-processing) and in avoiding re-shoots.
Tripod // Another game changer is shooting with a tripod and a remote. When it comes to photos that require such detail, you want to avoid as much shake and movement as possible (aka a tripod will be your best friend). Now, I don’t use a tripod for all of my food photos, but if there is movement, or I’m trying to get details on things like labels, the light is a little lower, etc. then I will definitely be using my tripod.
Reflectors + Boards // We have a reflector stand as well as black and white boards to bounce or diffuse light, add shadows, etc. depending on what our needs for the photo are. The reflectors cost a bit more, but basic white and black boards can be found at any craft store and are super affordable. And don’t be afraid to use things like a white curtain or sheet, a dark black baking sheet, etc. as makeshift reflectors or light diffusers.
Extra Edits // You can read all about how we edit photos here, but, when it comes to food photos, in addition to my usual editing, I almost always add in extra clarity and sharpening to really help the food pop and stand out.

Olive Oil Cooking Spray // To add highlights to food, brighten it up, etc.; especially useful for things like meat or brown items
Water Spray Bottle // To freshen up produce and make it pop
Q-tips // To clean up surfaces and spills
Fake Ice Cubes // To avoid puddles of water and melted mess when shooting cocktails and beverages
Apples // To help fill out empty dishes…because no one likes a half bowl of pasta (Simply cut an apple in half, place the cut side down in a bowl or the center of a plate and then style your food on top of the apple, obviously being sure to cover the apple entirely.)
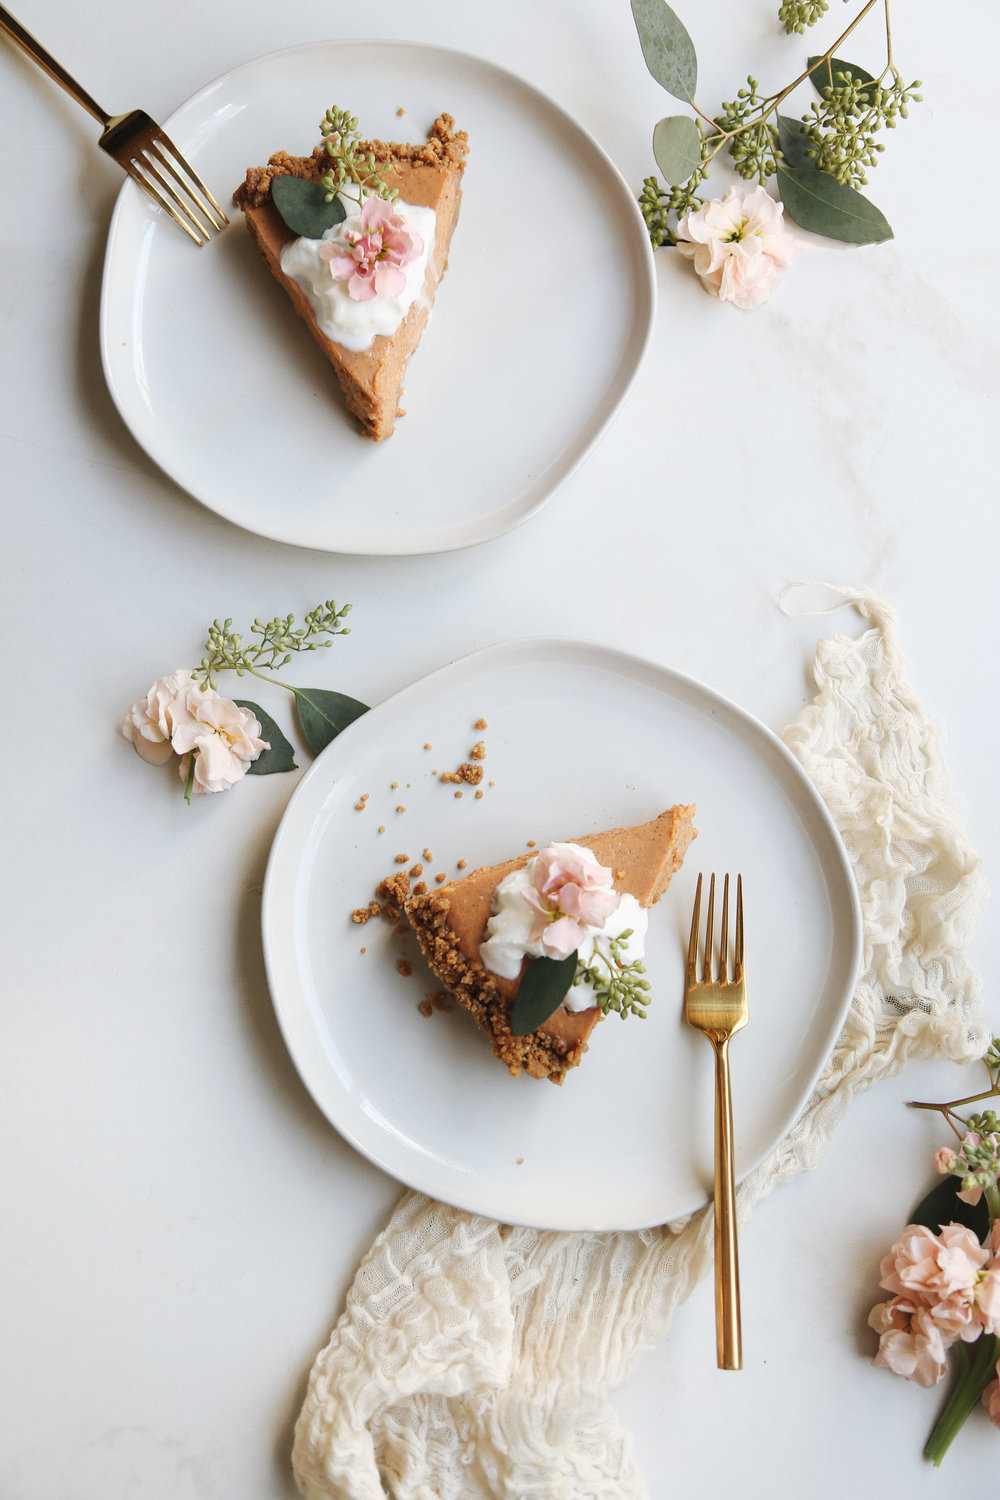
Make it a Mini // Dinner plates and forks look normal in real life, but in photos they often look gigantic and overshadow the food. Opt to use dessert or salad plates and small silverware instead so that we see the food, not the dish, in the final shots.
Garnish, Garnish, Garnish // When all else fails, garnish, garnish, garnish. I NEVER do a savory shoot without a handful of fresh herbs on hand. They’re the secret to covering up mistakes, brightening up dull food and just all around making things look more appealing, fresh, bright and appetizing. For sweet dishes, I use things like spices (cinnamon sticks, etc) and fresh fruit to brighten things up or add a pop of color.

parchment paper
wax paper
cheesecloth
metal measuring cups + spoons
vintage silverware
metal baking sheets, pie tins, etc
wooden mixing spoon
twine
fresh herbs + spices
linens
black silverware, gold silverware
an assortment of vintage serving ware
stoneware dishes
black plates
mini bowls (marble, patterned, wood)
a variety of different sized wooden bowls
wooden cutting boards
marble boards

Lighting is Key // I know I sound like a broken record, but truly, nothing is better than natural light, especially when it comes to food.
Practice Makes Perfect // I mentioned it above, but, don’t be afraid to play around and practice, practice, practice. Even if it’s just for a few minutes a day, taking a few practice shots helps you get comfortable with angles, lighting and food placement.
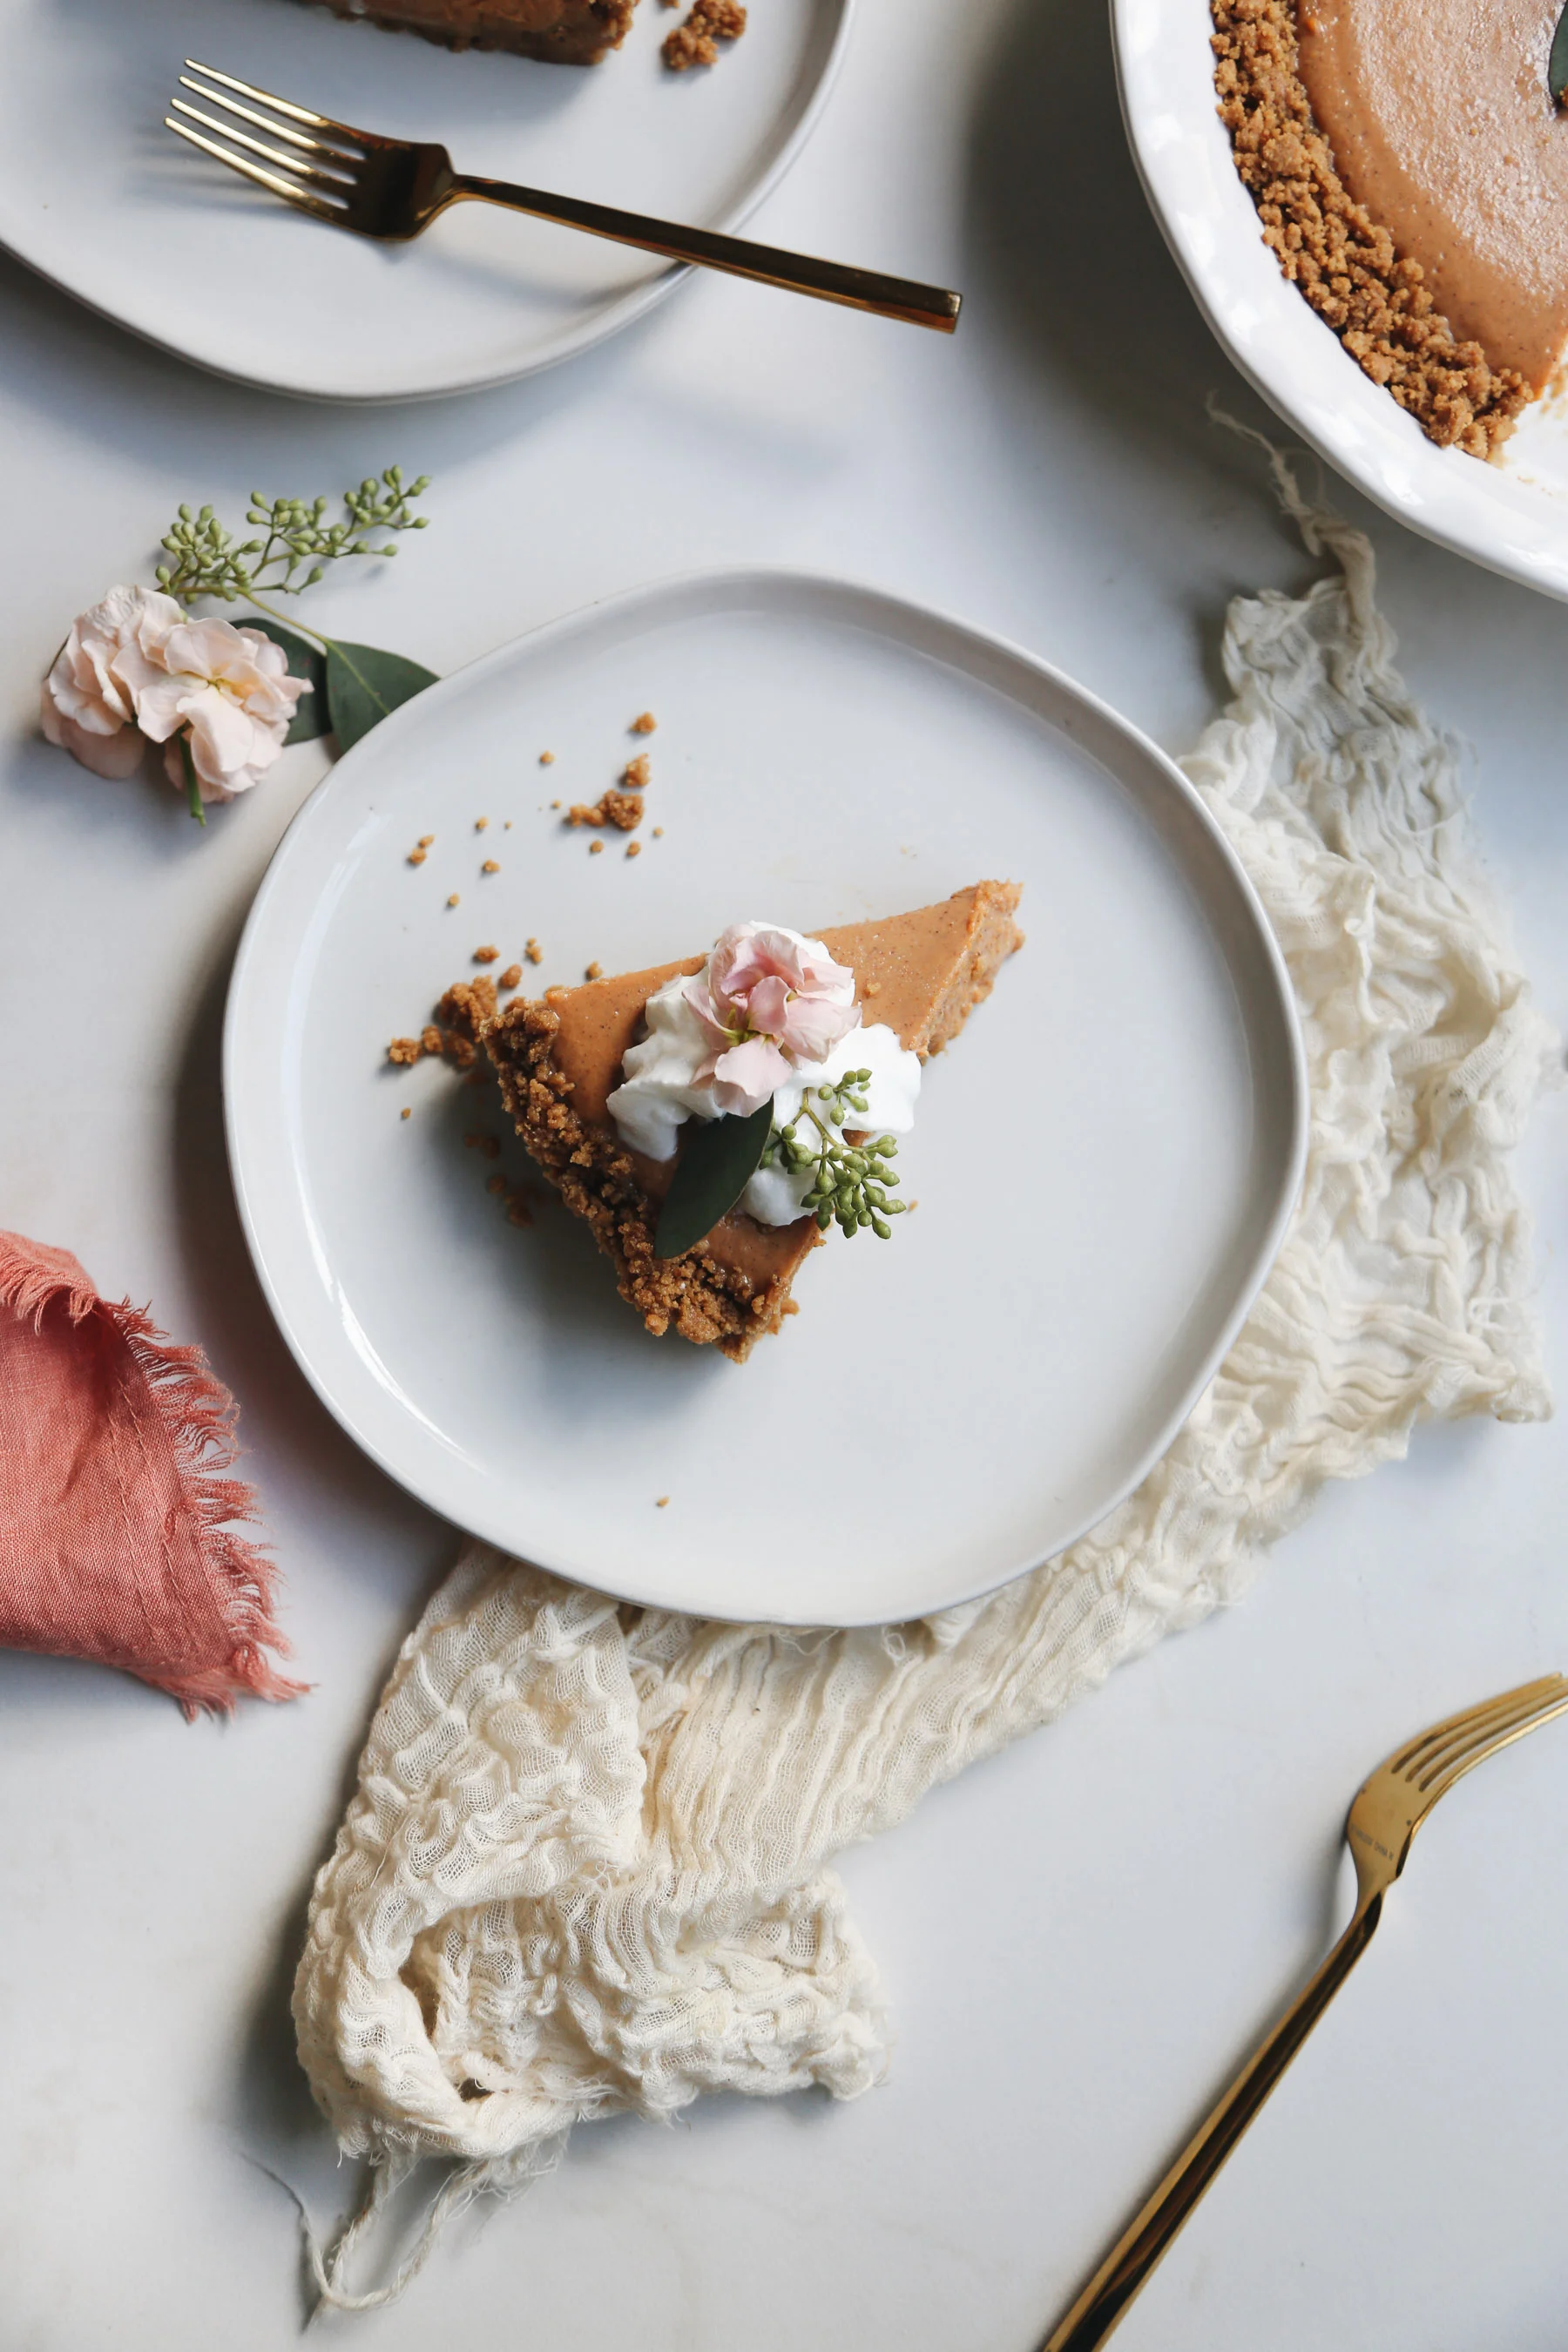
But Imperfect Often Works Best // While practice makes for perfect technique, don’t be scared of imperfect shots. In fact, in my opinion, imperfect food photos are some of the best. Whether it’s a slice of pie with a bite missing, some crumbs on the table, a messy napkin, etc. those details add life and character to a photo and keep them from looking like “just another a food picture.”
Be Inspired but Don’t Be Intimidated // When I first started shooting photos, especially food, I would pour over photos in magazines and on Pinterest, then try to imitate some or all aspects of various shots to help me understand placements, angles, etc. In fact, whenever I’m shooting a new (for me) type of food, I’ll still use this technique. However, it is always extremely important to remember two things- don’t be afraid of something that looks complex because chances are it’s actually not, and remember that you are simply using other work to be inspired, not to create a direct copy.
Get a Variety of Shots // When it comes to food, I like to really have a wide variety of shots, everything from the full dish to a close-up detail to mixing up the placement of items on the table to stacking dishes versus leaving them unstacked to including background details for context. I find that a mix of photos is crucial to telling the story of just how something tastes, looks and feels.
Rule of Thirds // Try to shoot things in threes- three glasses, three plates, etc. It keeps everything balanced without looking cluttered.
Keep it Balanced // Make sure you space looks balanced and make sure your props, food, and colors all balance each other out and compliment each other well.
Add Layers // Add layers, whether it’s several dishes or cutting boards, a few different napkins, etc. to add dimension to your photos and keep the food from looking flat.
Check the Details // Because so much of food photography comes down to details, be extra careful when it comes to the items and area you’re working with. Check for smudges on glasses, dirt under nails (if hands will be in the shots), too many crumbs or spills on plates or table tops, etc.

Use What You Have // People think that creating food photos requires and extensive prop closet, and at some point, for you, it may. But when you’re starting out, just keep it simple. You’d be surprised what you can find in your home and what things you already have that make excellent props and backgrounds- baking trays, twine, parchment paper, a basic linen napkin or dish towel, plane paper bags- are all common household things that work perfectly in food photos. And don’t forget about yourself. You can use your hands, yourself, your jewelry, etc. to accessorize a photo and make it unique to you.
A Few Basic Items go a Long Way // When I first started shooting food photos, like most beginners, I didn’t have a lot of money to spend on things outside of the actual food. So I started with a few household items (like I mentioned above) and added just a handful of additional items to complete my beginner food styling closet (which was really more like the deep, dark back corner of one of our kitchen cabinets). I purchased cheesecloth (still one of my most used props to this day), secured some hand-me-down vintage silverware, added a few plates and bowls from Ikea and purchased a marble cutting board on Amazon, and jI was good to go.

Many of my basic food photography rules that I mentioned above apply to shooting food in restaurants, the key one being light (but of course, right?!). I know some people who use light boxes so they can specifically shoot food in dark places or at night. However, my general rule of thumb is, unless there is natural light, I won’t shoot food in a restaurant. Which leads me to this…
Go at Odd Times // Go super early, the middle of a Tuesday afternoon, etc. Not only will this almost guarantee that you get that table right by the window (for prime light), it also means you will be less disturbed and less disturbing.
Pull Out Your Own Props // Use the jewelry or sunglasses you’re wearing, and don’t be afraid to bring your own additional props from home. I mean, not like a whole cutting board or anything crazy, but a linen napkin, some twine, cheesecloth, a book, etc, is totally fine. In fact, I don’t even go on a trip now, let alone a restaurant, without a few linen napkins to jazz up my food photos.
Ask for Additional Plates + Silverware // Don’t be afraid to ask for additional items, whether it’s a smaller plate so that you have less negative space to fill up, a napkin to clean up a dirty dish, or extra silverware for styling purposes, just ask for it.
All in the Details // The standard overhead shots are standard for a reason- they always look great. But don’t be afraid of other shots and angles, whether it’s getting hands in, a side profile, the restaurant’s decor, finding a cool corner or chair to put the plate before shooting, getting more of the table than the food in a picture, pulling fresh herbs or garnishes from one plate and adding them to another, getting a bit of your outfit in the shot, etc., etc.
Be Kind // If you are taking photos in a restaurant please just remember to be kind and polite. I have seen way too many people be way too obnoxious about this, ruining the dining experience for everyone else there and making the staff’s lives miserable. You should be kind and polite whether you are getting paid for this or not, but especially if you are not, go above and beyond to be respectful of noise and spaces of other customers, consider tipping the wait staff a little extra for their patience with you, and please, for the love of all things holy, only photograph what you will be eating and stopping wasting unnecessary amounts of food for ridiculous, over-the-top photos.

Ikea // affordable dishes and glasses, dish towels
Target // napkins, table linens, dishes, twine (I especially love their specialty collections, like Hearth & Hand, for affordable, yet high-end looking, pieces, and don’t forget to check the dollar section for some occasional hidden gems)
World Market // napkins, dishes, serving ware, miniature bowls, individual silverware pieces, a wide assortment of colored glasses, napkins, etc, for a reasonable price point
Michael’s // twine, sprinkles, clay (if I need it to hold certain things in place), holiday items, boards for reflectors and backgrounds
Goodwill/Thrift Stores/Flea Markets/Garage Sales // vintage silverware and serving pieces, unique dishes, old baking trays
Amazon // cheesecloth, baking dishes, twine, photography equipment
H&M Home // linen napkins and tablecloths, dishes, silverware
Zara Home // linen napkins and tablecloths
Etsy // one-of-akind pieces, vintage items (silverware and serving pieces)
eBay // vintage items, like silverware and baking trays
Terrain // linens, holiday items
Hardware stores // great for purchasing wood and tiles (like flooring tiles) to create backgrounds and “table tops”