DIY Candy Buffet


When it came to deciding on the favors for our guests, we had several options that intrigued us, all for different reasons. We tossed around the idea of something NY, but we already had that covered with our table names. Something fall would have been appropriate with our wedding date, but that really limited our options. Homemade limoncello came up in the discussion (we love making it...and I'm Italian, so there's that), but it seemed out-of-place with the rest of our wedding. The candy bar was, obviously, the choice we went with, not only because the hubs and I have a huge sweet tooth, but also because we though it would be fun for our guests, it added a festive corner to our reception room, it doubled as a name card and a favor, and as far as favors go, it was relatively affordable.

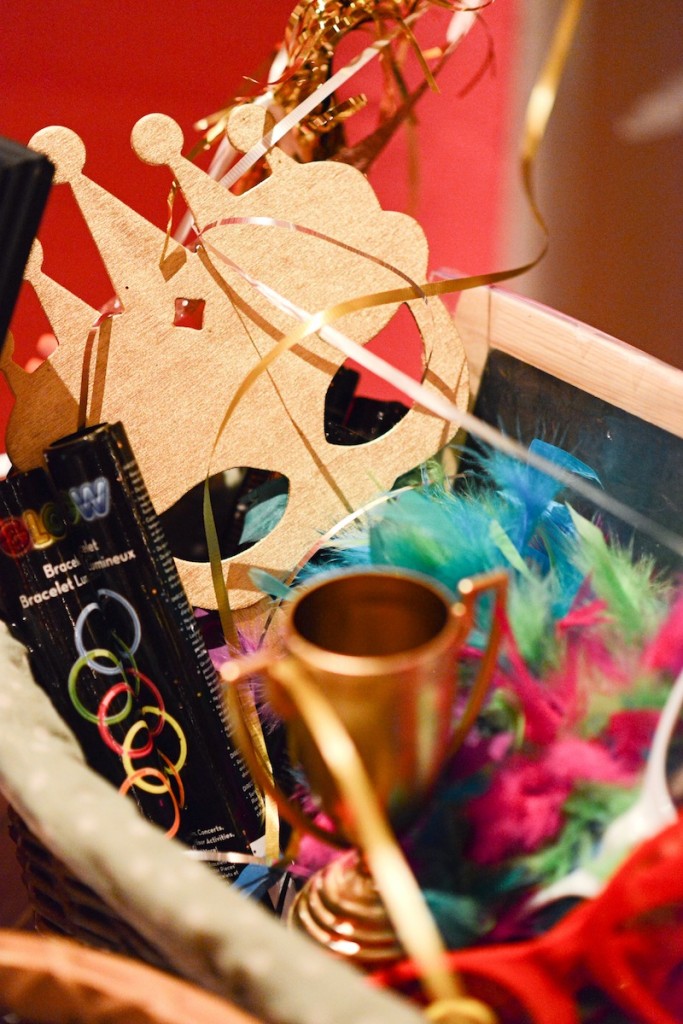
Like today's earlier DIY photo booth, you do not need a wedding as an excuse to make this candy buffet. It would be great for any party, be it a bridal or baby shower, a birthday party, a kids party, a graduation party, etc.

Here are the steps to making a DIY candy buffet-
Start by making a list of all the candies you want on your buffet. Include your favorites as well as things that are popular and anything that you think your guests will enjoy. Plan to have about 18-22 candy varieties and about 1/4-1/3 of a pound of candy per person, i.e. for 100 people plan to have at least 25 pounds of candy. Tip: Write all the candies you decide to use in an Excel sheet along with a column saying how many bags you need, the price of each bag, where to buy them, and if they have been purchased yet.

Research prices on the candies you have decided on. Look on-line, in bulk stores, and, if you get married around a holiday (we were right around the corner from Halloween) chances are you'll find a lot of candy on sale. Use the Excel sheet I mentioned above to track prices and find the best deal. We ended up buying our candy from CandyWarehouse, Nuts.com, Economy Candy, and Target.
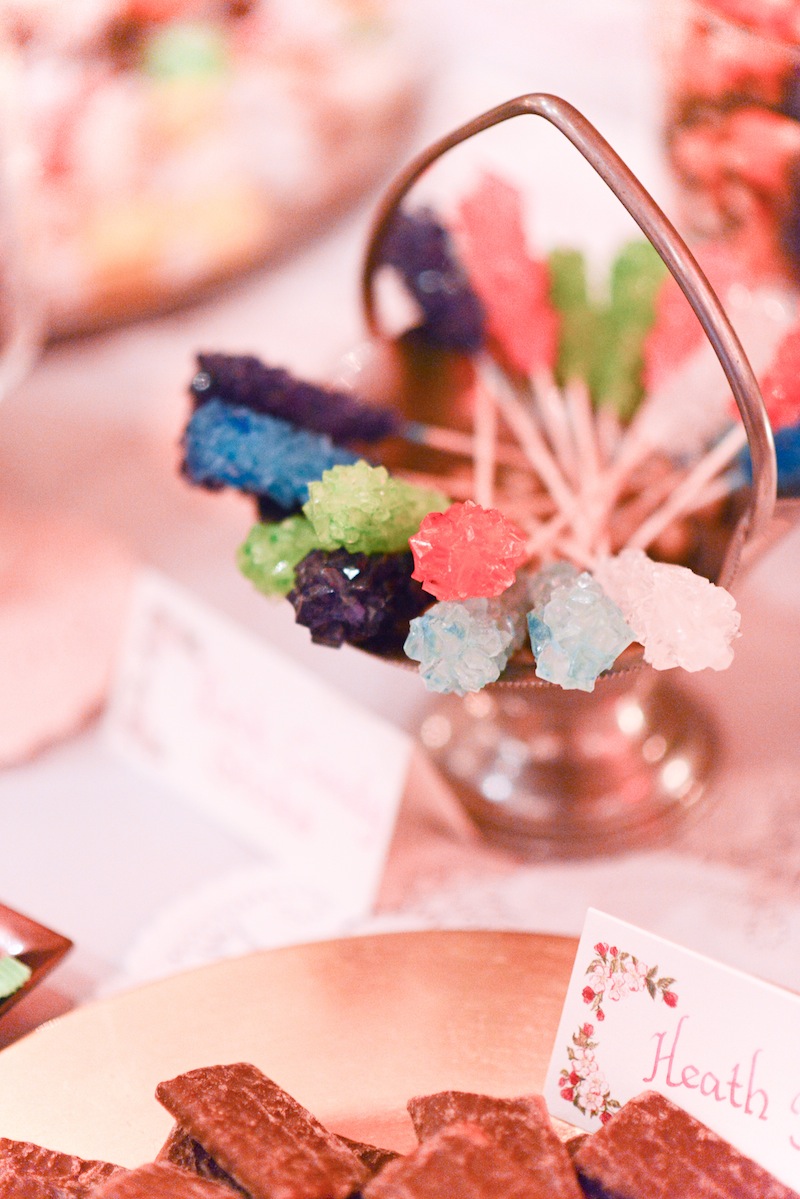
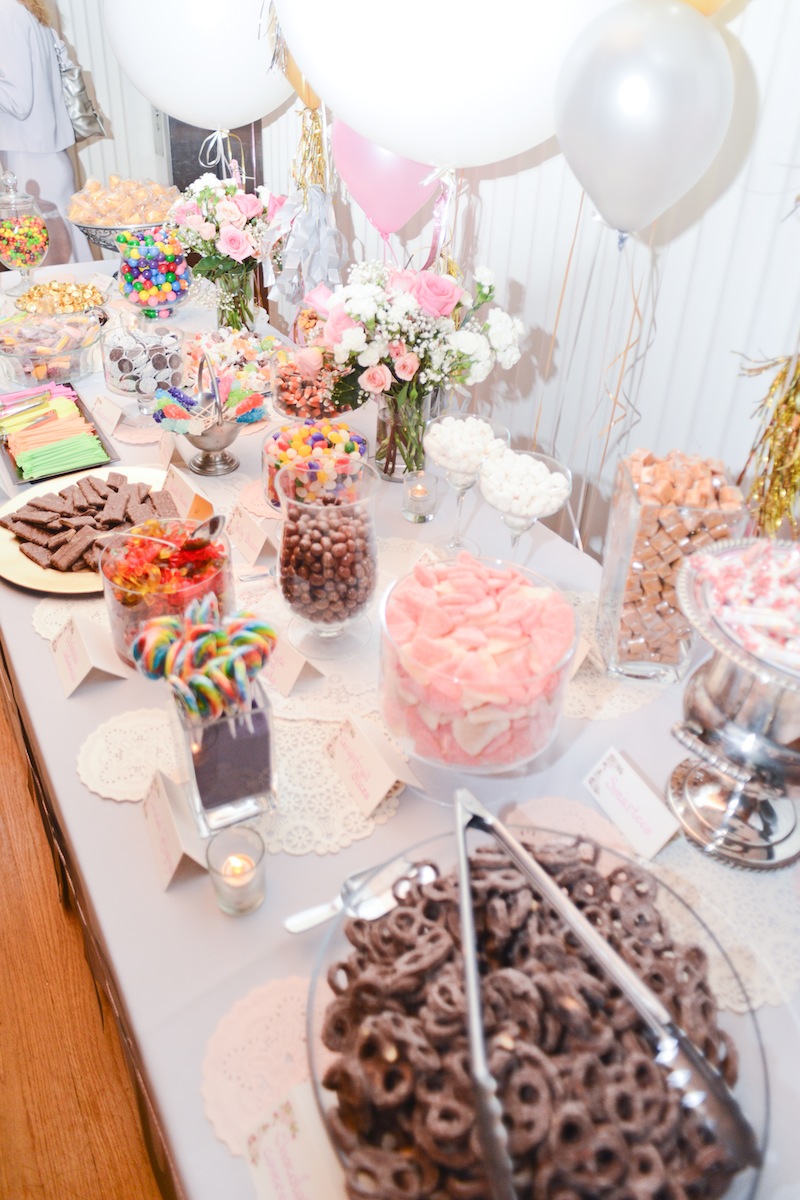
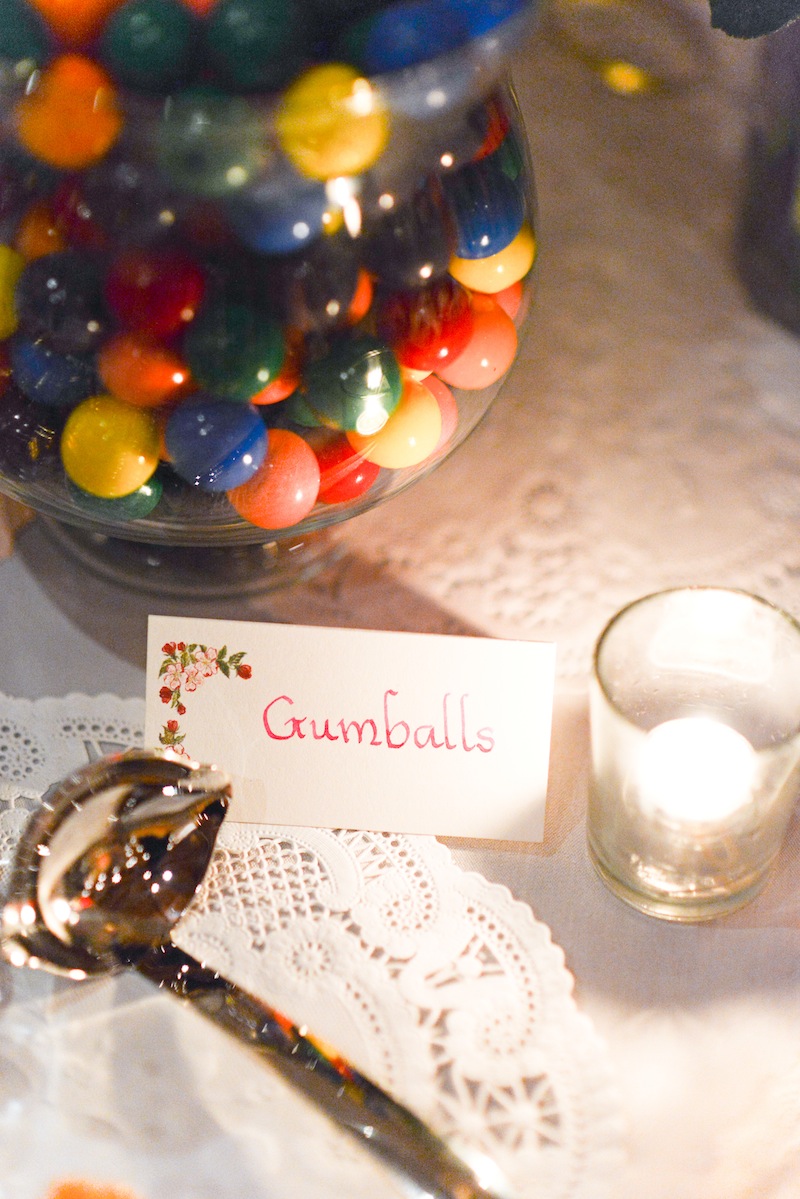
The candies we used were- gum balls, caramels, taffy, rock candy, lollipops, champagne jellies, candy corn (since our wedding was in October), heath bars, flavored marshmallows shaped like cupcakes, candy sticks, candy straws, nonpareils, rolos, gummy grapefruit slices, gummy octopus, chocolate covered pretzels, chocolate covered raisins, chocolate covered peanuts, wedding fortune cookies, skittles, jellybeans, and smartees.
Make sure you get your candy far enough in advance that you aren't freaking out about it, but not so far that it can get stale. We ordered our candy about a month to three weeks out, and then refrigerated the chocolate and stored the rest in a dark closet. This should be a no-brainer, but keep everything sealed right until you set the buffet up to ensure maximum freshness.
Next, you will need dishes to hold the candy. Things with wrappers will work in baskets, but unwrapped candy should be placed in bowls, plates or glass dishes. Do not be afraid to mix things up or have mismatched pieces, and definitely think outside the box. We used a variety of dishes from my Mom as well as ones we purchased at the Christmas Tree Shops and Michael's. We had plates, bowls, vases, trays, trifle dishes, margarita glasses and we even used a vase filled with sand to hold the lollipops. Don't forget to have tongs and spoons (can be found on-line, at Sur La Table, or Target) to help your guests get the candy out of the containers.

Once you have all the candy and the dishes, I suggest doing a mock set-up. Lay a table cloth/blanket/sheet of fabric that is the size of your buffet table out on the floor (or a use a table, if you have one that is big enough). Begin setting out the dishes and playing around with them until you have a layout that you like. I recommend putting the highest things towards the back, but then mixing the other containers around to achieve variety and depth. Next, pair each of your (unopened) candy bags with a dish. Again, play around with this to get the right set-up of colors, shapes, and size. Once you have the "buffet" to your desired look, take pictures and draw a simple "map" marking where each dish and candy should go. This will help tremendously when the candy buffet is being set up at your wedding.
Make labels so your guests can clearly tell what each candy is. For our labels, my Mom used Crane place cards with pink flowers on them (to match our wedding colors) and then hand-wrote each candy name out. The cards were then placed in front their corresponding candy dish.
The candy may look pretty on its own, but your buffet will still need some decorating. The table, which was provided by our venue, was covered in a white table cloth (also provided by our venue). On top of the cloth, we then layered a variety of doilies. After the candy was set out, small votives were placed around sporadically, and the flowers from the altar at our ceremony were added to the back of the table. Our backdrop was a wall of balloons, including smaller pink, silver and gold ones (to match our wedding colors) and then several bigger ones that we made to match the ones next to our photo booth (seen here). We tied everything together with a sign that said "Sweet Treats", which was made from letters cut out of gold poster board and then strung together with twine.

The jars that we provided for our guests were around a $1 each at Christmas Tree Shops. Finding the perfect jar wasn't easy- there were a lot of options, in a lot of price ranges and we had even looked at getting mini boxes that resembled bulk candy containers, but we ultimately chose these jars based on how they looked, their size and the price. We then printed off tags that said "Thank you for joining us on our special day! After you eat, make sure to grab some sweet treats!" along with our initials and our wedding date. On the back side we wrote the guest's name and the table they were sitting at. We then attached them to the jars using twine.

All pictures taken by our incredible wedding photographer Lesley of Kensington Blue
- Tags, "Sweet Treats" sign, Candy Label, and Balloons- DIY
- Favor Jars- Christmas Tree Shops
- Candy Dishes- Christmas Tree Shops, Michael's, my Mom
- Serving Ware- Sur La Table, my Mom
- Doilies- my Mom (similar here)
- Twine- Paper Presentation (similar here)
- Candy- CandyWarehouse, Nuts.com, Economy Candy, and Target