
Snowy Christmas Tree Sugar Cookies

Snowy Christmas Tree Sugar Cookies
I love a good sugar cookie moment. I know, I know, they’re kind of basic and they’re nothing groundbreaking, new or exciting. But they are pretty much the OG Christmas cookie and, well, you really can’t ever go wrong with an OG.
You know why else you can’t go wrong with sugar cookies? Because they’re simple, only require a few ingredients and they’re so easy to make. They’re also really adaptive and easy to adjust, whether you need to make the cookies in advance (which you can easily do), double the recipe or swap out ingredients. They also make for a really fun and festive activity with family or friends, for a holiday party or even as a Christmas day activity, cutting out, frosting and decorating cookies together, while sipping hot chocolate and listening to Christmas music or watching a holiday movie. Always one of my favorite seasonal activities and the perfect way to spend an afternoon during the holiday season! And even if you don’t decorate them with anyone else, they’re still perfect to share with family and friends or add to a cookie gift box. I mean, because who doesn’t love getting sugar cookies??!
The other thing I absolutely love about sugar cookies is that in a way, they’re kind of like snowflakes. Each cookie gets decorated just a little bit differently. And the toppings and ways they can be decorated are really quite endless. No two look exactly alike, even if you use the same cookie cutter. And, I don’t know, call me crazy, but I just feel like there is something so magical about that, especially when it comes to cookies for Christmas.
For today’s Christmas Tree sugar cookies, I used my go-to recipe. I dive more into it into the notes below the actual recipe, but a few high-level things to keep in mind. I opt to skip baking powder in my recipe. Baking powder helps baked goods rise, and while I want that in a biscuit, it’s not exactly what I’m looking for in a thin and delicate cookie, you know what I mean? While you absolutely can add some to the recipe if you feel inclined to do, the cookies will come out a bit fluffier, and I find they tend to taste stale more quickly. Instead, I like to add cornstarch for a cookie that is just fluffy enough without being too soft, and with edges that are perfectly golden brown and crisp. Another important thing you’ll notice is that my cookie recipe calls for butter that is cold. I know it might seem odd as most recipes call for room temperature or softened butter, but here’s the thing, by using cold butter it a) eliminates the need to chill the dough which eliminates the need to wait to make and, more importantly, to eat cookies (because let’s be real, who honestly has time to wait to eat delicious cookies??!) and b) it helps ensure the cookies keep their shape while they bake. So it’s essentially a win all-around.
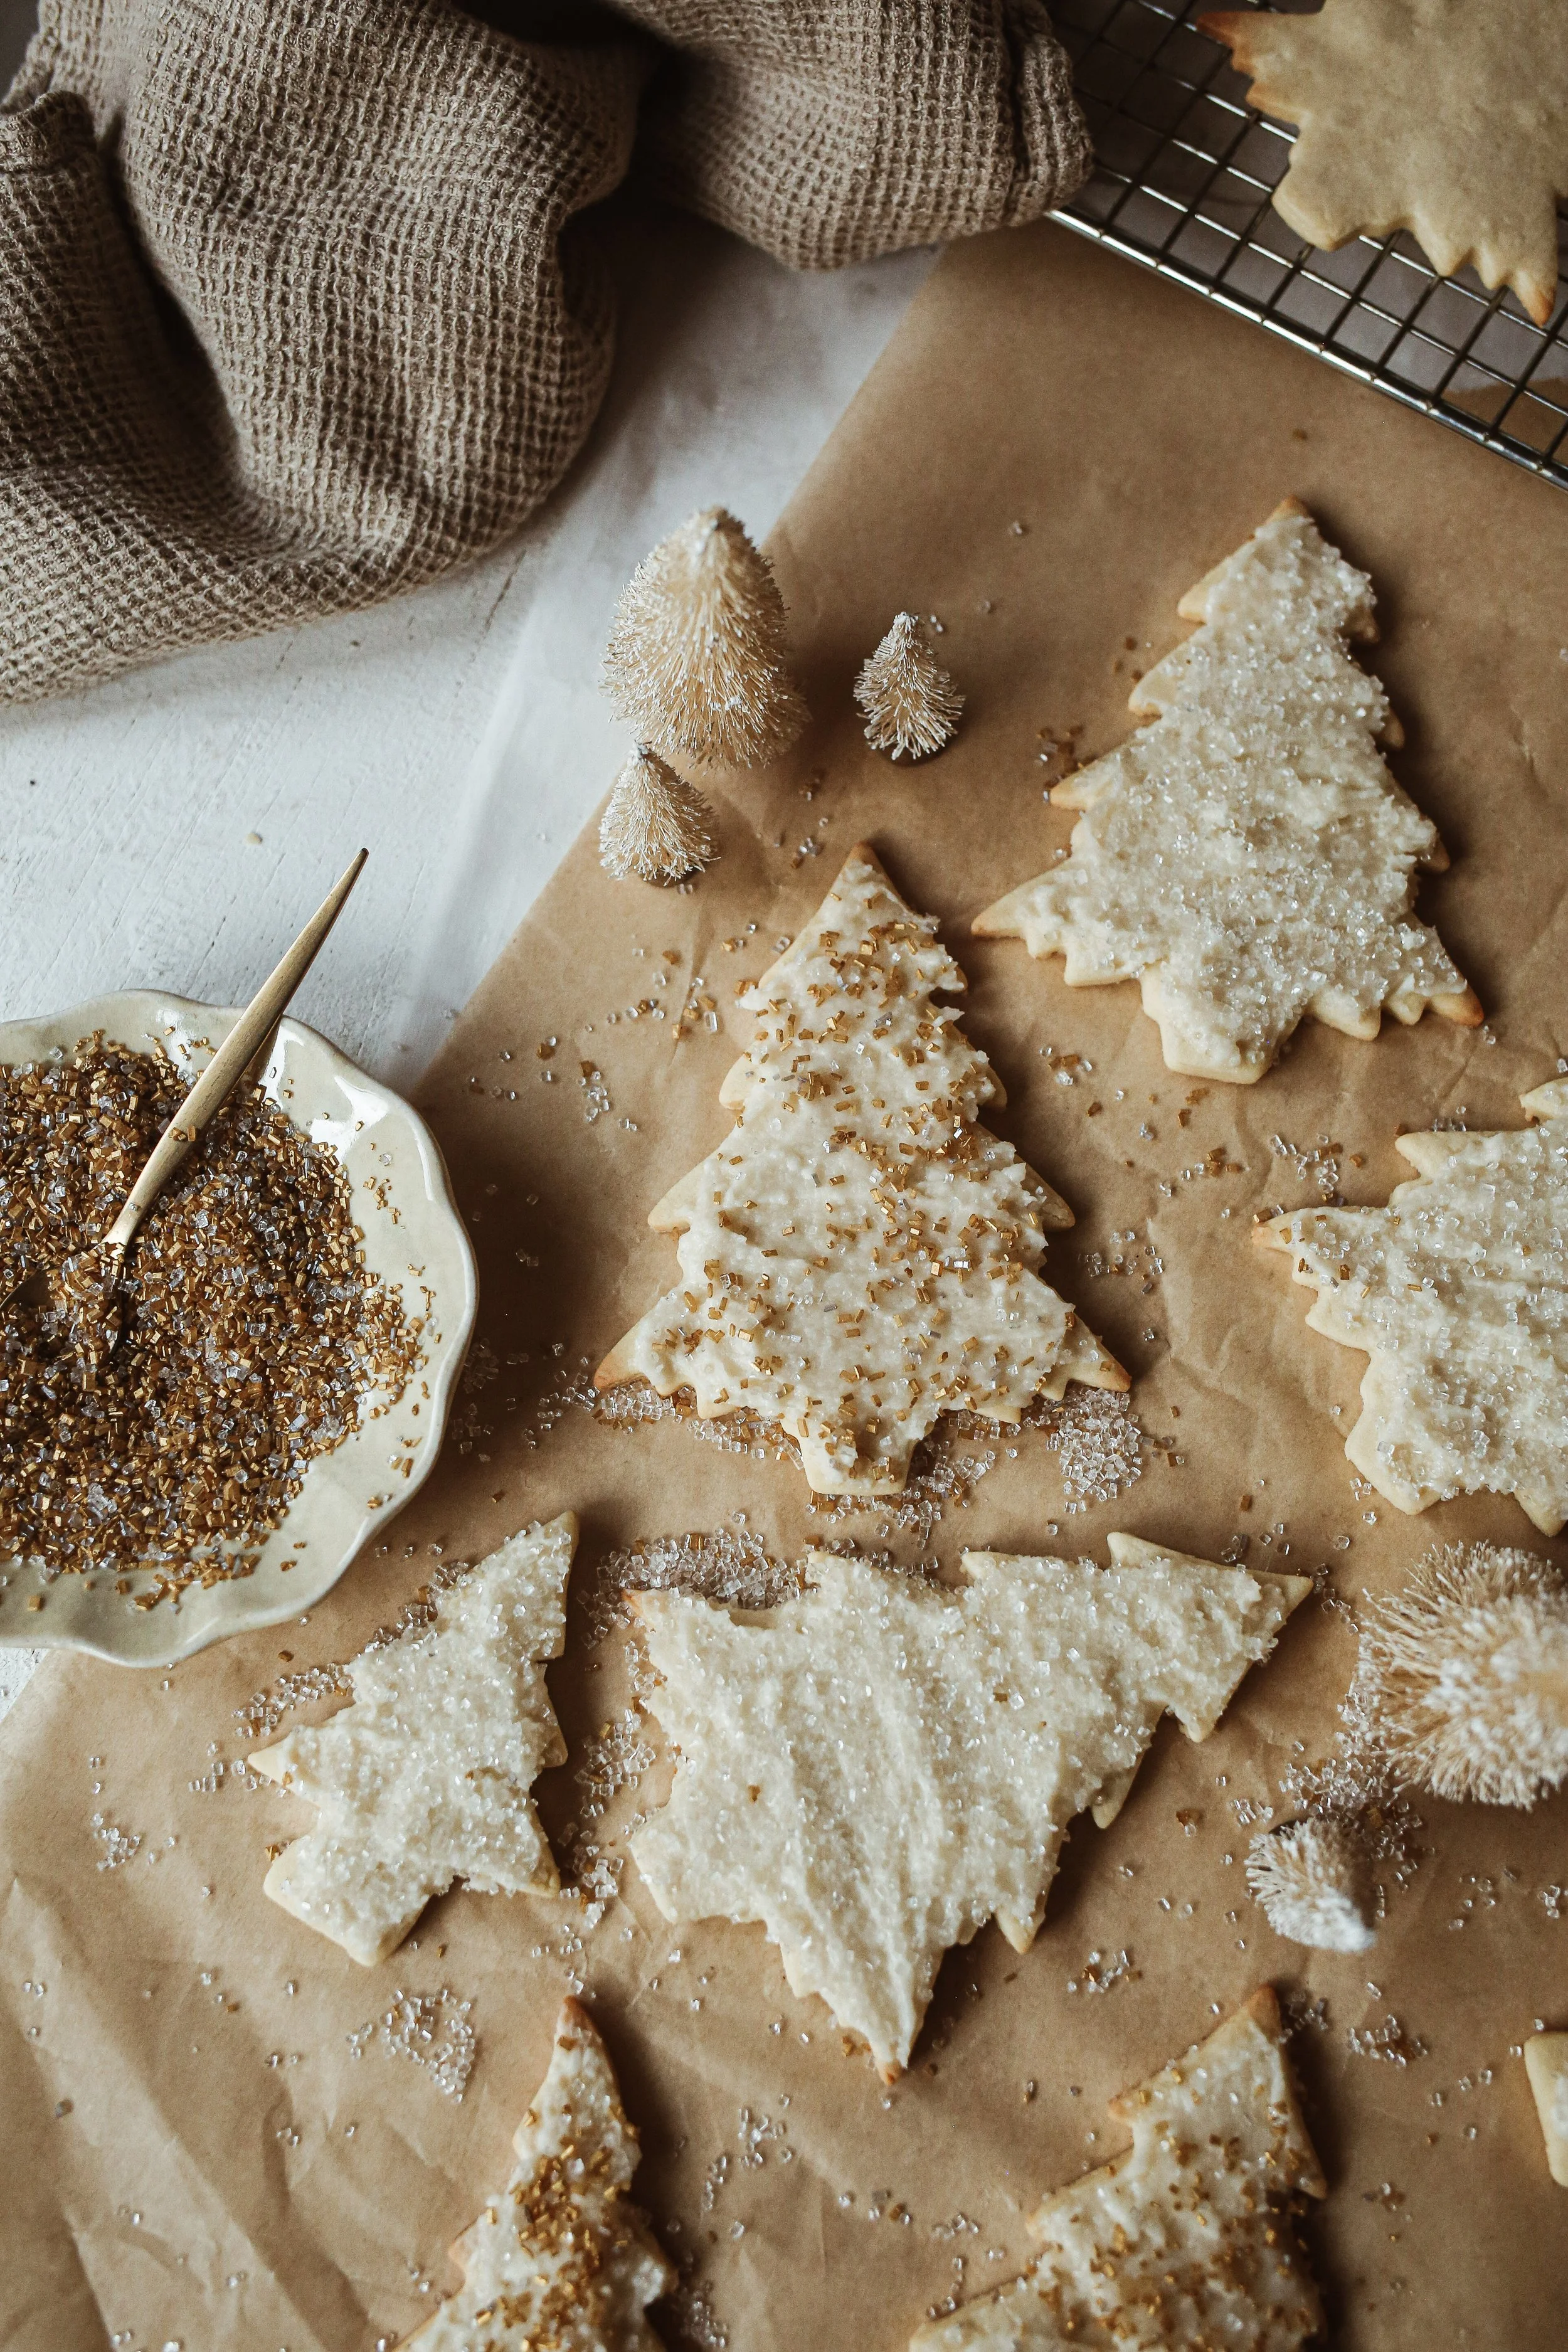
One last note- you can make this cookies any shape you want and decorate them however you want. However, for me, there’s just something so classic, simple and chic about a Christmas tree shape. And with visions of a white, snowy Christmas in my head, paired with some of the recent snowy winter wonderland photos that I’ve been sharing from Switzerland, I was inspired to go for a cookie that looked like it was right out of said snowy winter wonderland, with a creamy, snowy white frosting and a little magical, glistening sparkle from some edible glitter. It’s nothing fancy, but still feels perfectly special and magical for this time of year.


WHAT INGREDIENTS YOU NEED TO MAKE CHRISTMAS TREE SUGAR COOKIES
You only need a few mostly pantry staple, ingredients to make these sugar cookies. But because there are so few ingredients you really need them to make an impact so I encourage you to get the highest quality ingredients that you can, especially with the butter and eggs. Fewer but better is the motto here.
BUTTER- for both the dough and the frosting; use the highest quality unsalted butter you’re able to and make sure the butter for the dough is cold and straight from the fridge as this helps the cookies maintain their shape while they bake without having to chill the dough in between; while I’ve not tried the cookies with vegan butter, you can swap out the butter for vegan butter in the frosting with very delicious results
EGGS- high quality, fresh eggs are best
SUGAR- granulated for the dough, powdered confectioners for the frosting; you can use powdered sugar for the cookie dough, too, however, the cookies will taste a bit more like shortbread and have a bit more of a crumbly texture
FLOUR- nothing fancy, just good ol’ all-purpose flour
CORNSTARCH- the secret ingredient to help the cookies stay slightly soft while also having a nice crunch and golden brown edges
SEA SALT- you can also use kosher salt
VANILLA EXTRACT- for just a hint of flavor in both the dough and the frosting; it’s subtle and definitely makes a difference in the overall flavor but it can be skipped without too much of an overall impact. Additionally, instead of vanilla you could use something such as orange extract, citrus zest, almond extract or, to be really seasonal and festive, even try peppermint extract.
HEAVY CREAM- to help the frosting come together in a thick and creamy mixture
SPRINKLES- I obviously went with edible glitter to give my cookies a magical snowy effect, but feel free to use any sprinkles, candies or other decor of your choice.


HOW TO MAKE CHRISTMAS TREE SUGAR COOKIES
STEP 1- Mix up your dough. The key here is to make sure you whip together the butter, sugar and eggs until it’s nice and fluffy, before adding the dry ingredients.
STEP 2- Roll out the dough.
STEP 3- Use a christmas tree cookie cutter to cut out the cookie shapes. I like to provide some variation by using a few different sizes of cookie cutters but feel free to keep them uniform and use just one size. You can also use any other cookie cutter shapes you want.
STEP 4- Place the cookies on a baking sheet and bake until golden brown.
STEP 5- Whip up the frosting while the cookies bake and cool.
STEP 6- Let the cookies cool fully then frost, sprinkle and decorate to your hearts content.


TOOLS YOU NEED TO MAKE CHRISTMAS TREE SUGAR COOKIES
A MIXER- I like to use my stand mixer but if you don’t have a stand mixer, you can use a large bowl and hand held electric mixer instead.
A ROLLING PIN- I find using a marble rolling pin works best to prevent any stickiness and to ensure the dough remains as even as possible.
TREE COOKIE CUTTERS- to get the Christmas tree shape; you can use any other shapes you want, as well
EDIBLE GLITTER- to create the snowy tree effect; feel free to use any other edible glitter or sprinkles of your choice
BAKING SHEET- to bake the cookies (of course); I like to have at least two trays so one can be in the oven while the other is being prepped with cookies
PARCHMENT PAPER OR SILPAT MAT- to ensure the cookies don’t stick to the baking tray


Christmas Tree Sugar Cookie Pro Tips
WHY USE COLD BUTTER- Make sure that the butter for the dough is cold and straight from the fridge. This allows the cookies to keep their shape while they bake without needing any time to chill the dough in between making it and baking it.
WEHN ROLLING OUT THE DOUGH- Make sure your surface is super clean, and then be sure to keep the surface and rolling pin well-floured. I also find that this process works best when you use a cool marble rolling pin.
IF YOU HAVE STICKY COOKIE CUTTERS- If you find the cookie cutters are sticking to the dough, try lightly dusting them with flour before using the cutters. If you find the cutters cut the dough in a way that kind of stretches it out in the process, the dough is probably either rolled out too thin (so form it into a ball and roll it out again) or it’s too soft (so form it into a ball and pop it into the fridge or freezer for a few minutes).
ROOM TEMP BAKING SHEETS- Make sure you only place cookies to be baked on a room temperature baking sheet. Once a tray comes out of the oven be sure to allow it to fully cool before using it to bake more cookies, otherwise the cookies will start to cook as soon as they hit the tray which will result in uneven baking. To help keep the baking process going, I usually have 2-4 trays going so that one or two can be baking while the other one-two can be cooling.
MAKE THESE COOKIES YOUR OWN- You know me, of course I had to keep my Christmas tree cookies neutral so I went with a snowy magical edible glitter situation, but have fun with these and really make them your own. Go more traditional with green frosting, add touches of red, you can even pipe on frosting designs, or divide the frosting into several bowls and dye each a different color. The options are really endless.
FAQ
CAN THE DOUGH BE MADE AHEAD?
The dough can be made several days in advance. Once it’s mixed, shape it into 2 round flat discs, wrap tightly in plastic wrap, then store in the refrigerator. Once you’re ready to bake the cookies remove the dough from the refrigerator and allow it to soften to room temperature before rolling it out.
CAN YOU BAKE THE COOKIES AHEAD OF TIME?
Yes, you can cut out the cookie shapes, place them on a lined baking sheet, cover lightly with plastic wrap or a clean kitchen towel and store it in the fridge for up to 24 hours prior to baking. You can also bake the cookies up to 24 hours before frosting them. However, I would store the baked cookies separately (in an airtight container or bag) from the frosting and only frost them once you’re ready to serve and eat them.
DO YOU NEED TO CHILL THE DOUGH BEFORE BAKING?
No and here’s why. Chilled butter. When you use cold butter straight from the fridge it helps the cookies maintain their shape during baking, without having to chill the dough in-between the shaping and the baking.
CAN THE FROSTING BE MADE AHEAD?
The frosting can be made up to 2 days in advance. Just store in an airtight container in the refrigerator until you’re ready to use it. Then let it soften to room temperature before using so that it can easily be spread on the cookies.
IS THERE A DIFFERENT FROSTING YOU CAN USE?
I personally prefer buttercream frosting (like the recipe I’ve included), however royal icing is another great option, or save yourself some time and use a store bought option. You can also color the frosting by adding food coloring (I prefer gel food coloring) if you’d prefer green Christmas tree cookies (or any other color you like) instead.
CAN THIS RECIPE BE CUT IN HALF OR DOUBLED?
Yes, this recipe can easily be cut in half or doubled easily without any issues. In fact, I do so myself all the time.
OK, BUT EXACTLY HOW MANY COOKIES DOES THIS RECIPE MAKE?
So, here’s the thing. The amount of cookies this recipe makes varies greatly depending on the size of cookie cutter you use. The larger your cookie cutter, the less cookies and the smaller your cookie cutter, the more cookies you’ll have. I tend to use small to medium sized cookie cutters and usually end up with about 3-4 dozen cookies.

LOOKING FOR OTHER HOLIDAY COOKIES THIS SEASON?
Here are a few more of my festive favorites to help you celebrate the season-
RUM BALLS- easy, no-bake, just a few ingredients and yes, rum is involved
CAMPFIRE COOKIES- salty, sweet, crunchy, a little smoky, 1000% delicious and reminiscient of being around a campfire without ya know actually having to build a campfire (or be outside for that matter)
PIZZELLES- A classic any time of year but always nice around the holidays because they look like snowflakes


CHRISTMAS TREE SUGAR COOKIES
YIELDS APPROXIMATELY 3-4 DOZEN COOKIES
INGREDIENTS
FOR THE COOKIES
1 cup unsalted butter, cold
1 cup granulated sugar
2 eggs
3 1/2 cups all-purpose flour
1/2 cup cornstarch
3/4 teaspoon sea salt
2 teaspoons vanilla (for flavor, optional)
FOR THE FROSTING
1/2 cup unsalted butter, softened slightly
1 1/2-2 cups powdered sugar
3-4 tablespoons heavy cream, milk or non-dairy creamer of your choice
Pinch of sea salt
1/2 teaspoon vanilla (for additional flavor, optional)
Sprinkles, edible glitter, candies, other cookie decor of your choice
INSTRUCTIONS
Preheat oven to 375 degrees. Line a large baking sheet with parchment paper or a silpat mat. Set aside.
In the bowl of a stand mixer, with the whisk attachment, cream together the butter and sugar on medium speed until combined and smooth. Add in the eggs and continue beating until the mixture is creamy and fluffy (fyi-this can take several minutes and the mixture can look a bit crumbly before it starts to come together and look creamy).
Add in the remaining ingredients (flour, cornstarch, salt and vanilla) and mix on low speed, just until everything is incorporated and the dough comes together.
To roll out the dough, I find it’s easier to work in batches, so I first divide the dough into quarters. Then roll it out on a lightly floured surface, or between two pieces of parchment paper, until it’s about 1/4 inch thick, being gentle as you roll the dough so that it’s not too thin and/or doesn’t break. Cut with tree shaped cookie cutters (or your preferred shape). Place about 1/2 inch apart on the prepared cookie sheet and bake for 9-12 minutes. Transfer to a cooling rack. Repeat with each quarter of dough until you’ve used it up.
While the cookies cool, make the frosting. In the bowl of a stand mixer, with the whisk attachment, beat butter and powdered sugar until combined. Slowly add in the liquid, 1 tablespoon at a time, until you reached your desired frosting consistency. Then mix in the salt and vanilla.
Once the cookies are cooled, frost and decorate to your liking. Store in an airtight container. Best eaten within the first 24 hours but they will last 3-4 days.
NOTES
MAKE AHEAD DIRECTIONS
FOR THE DOUGH- The dough can be made several days in advance. Once it’s mixed, shape it into 2 round flat discs, wrap tightly in plastic wrap, then store in the refrigerator. Once you’re ready to bake the cookies remove the dough from the refrigerator and allow it to soften to room temperature before rolling it out.
FOR THE FROSTING-The frosting can be made up to 2 days in advance. Just store in an airtight container in the refrigerator until you’re ready to use it. Then let it soften to room temperature before using so that it can easily be spread on the cookies.
CAN YOU BAKE THE COOKIES AHEAD OF TIME?
Yes, you can cut out the cookie shapes, place them on a lined baking sheet, cover lightly with plastic wrap or a clean kitchen towel and store it in the fridge for up to 24 hours prior to baking. You can also bake the cookies up to 24 hours before frosting them. However, I would store the baked cookies separately (in an airtight container or bag) from the frosting and only frost them once you’re ready to serve and eat them.
IF YOU HAVE STICKY COOKIE CUTTERS
If you find the cookie cutters are sticking to the dough, try lightly dusting them with flour before using the cutters. If you find the cutters cut the dough in a way that kind of stretches it out in the process, the dough is probably either rolled out too thin (so form it into a ball and roll it out again) or it’s too soft (so form it into a ball and pop it into the fridge or freezer for a few minutes).
CAN THIS RECIPE BE CUT IN HALF OR DOUBLED?
Yes, this recipe can easily be cut in half or doubled easily without any issues. In fact, I do so myself all the time.
SUBSTITUTIONS
VANILLA- Instead of vanilla you could use something such as orange extract, citrus zest, almond extract or, to be really seasonal and festive, even try peppermint extract, or you can omit the flavoring altogether.
GRANULATED SUGAR- You can use powdered sugar for the cookie dough, however, the cookies will taste a bit more like shortbread and have a bit more of a crumbly texture.
BUTTER (FROSTING ONLY)- You can swap regular butter for vegan non-dairy butter in the frosting with delicious results.
SHOP THE POST
ITEMS + INGREDIENTS NEEDED TO MAKE THIS RECIPE


