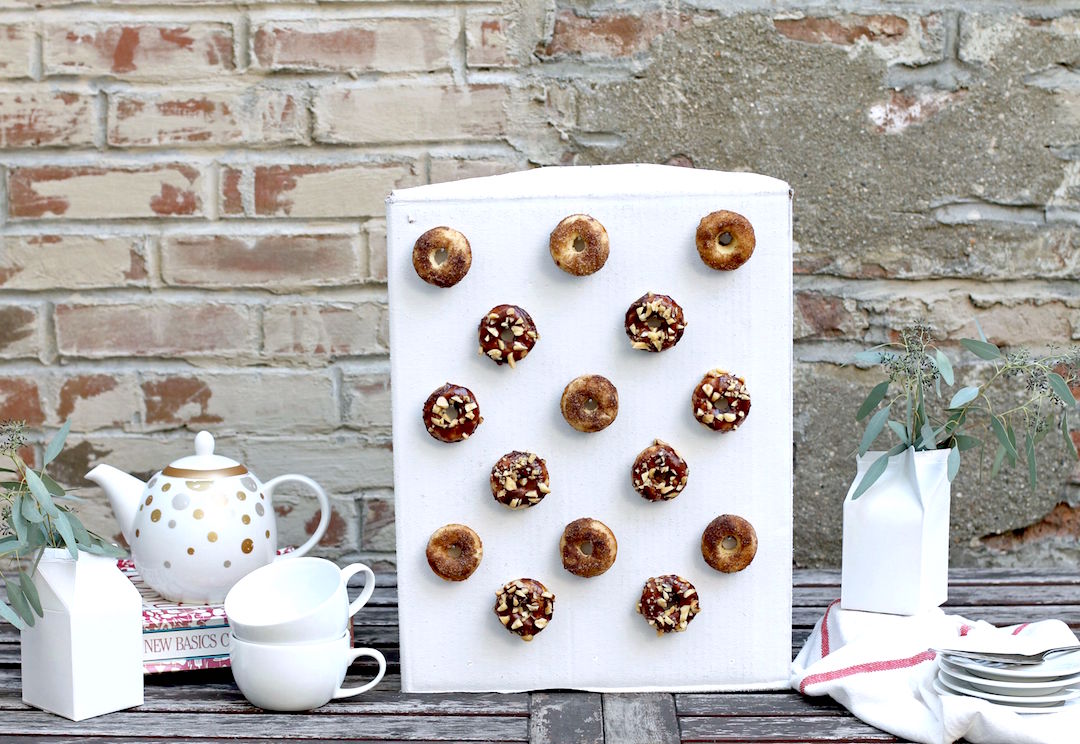
DIY Donut Wall


When I was at a recent Microsoft party, one of the many food stations that they had was a donut wall. I stared at the thing in awe, before snapping about 500 pictures and then promptly eating more than my fair share of donuts. Since that party, I've seen donut walls popping up all over the place. Actually, let me rephrase that...all over the place except for our apartment. Clearly, this was an issue that needed to be fixed. I mean, if it were up to me, at least one wall in every building would be a mandatory donut wall. Could you image, knowing that any place you walked in to you could just grab a donut off the wall?! Pure heaven! The bad news is that that probably won't happen anytime soon. But the good news is, I figured out how to make my own. Since I live in a shoebox and don't have the space to store a giant piece of pegboard (the material used in the other donut walls I've seen), I created a smaller, disposable one using an old box, my ever faithful spray paint, and a few nails. It's the perfect way to display donuts for a party, jazz up a weekend brunch, or, ya know, convince your other half that donuts are a weekly staple (...because duh! a donut wall isn't a donut wall without some delicious donuts!). Donut worry (Sorry, I couldn't help myself!), I'm sharing the instructions on how you too can make your own DIY donut wall. Keep on reading below.
Supplies
- Cardboard box
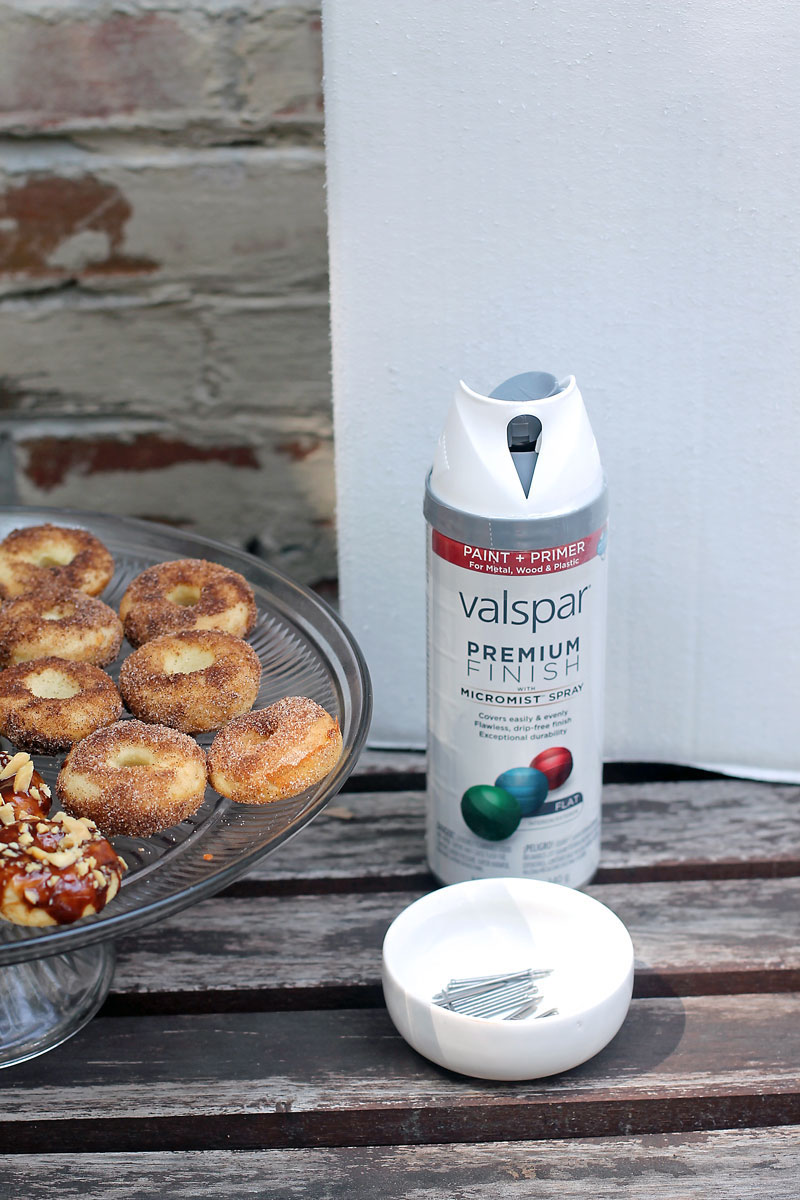
- White spray paint
- Hammer
- Nails
- Small heatproof bowl
- Hot water
- Mini donuts
1. First you'll want to sterilize your nails by placing them in a small heatproof bowl and covering them with boiling water. Leave them in the water for at least an hour.
2. Next, cut out one panel of the cardboard box (lengthwise). You should have a piece with three folds in it, with each of the two outside panels having a top flap.
3. Lay the cardboard out flat with whichever side you want showing facing up. Begin spray painting in thin even coats, making sure to let every coat dry completely before adding on the next one. Continue adding coats of paint until the cardboard is covered, about 6-8 coats.

4. Stand the piece of cardboard up, with the two flap pieces at the top. Fold the cardboard into a triangular shape, overlapping the top flaps and cut off excess cardboard to ensure you have smooth angles when folding the box.

5. Attach the two top flaps together with three nails. It may help to make holes where you want each one first before placing the nails in.

6. At this point, this is what it should look like from the back and the top.

7. To finish, poke the sterilized nails into the front of the donut wall. I alternated between rows of 3 nails and rows of 2, spaces evenly, but judge how many nails you'll need based on the size of cardboard and the amount of donuts you have.

8. The donuts will make the stand top heavy, so you'll want to place the finished stand over a small pot (you could also use a bowl, rock or brick) to help keep it in place.

9. Once your wall is complete, decorate it with donuts and then dig in!